.png)
How to Add Scheduling on Your Website
Need help managing appointments directly on your website? Learning how to add Scheduling can streamline your booking process and save valuable time. This guide will walk you through the step-by-step process of embedding the online appointment scheduling tool on your website, even if you don't have extensive coding knowledge. No need to write custom code! By following these simple instructions, you'll be well on your way to offering a convenient scheduling experience for your website visitors and converting them into paying customers.
Table of Contents
Add Scheduling on Your Website
If another provider hosts your website and you purchased the Scheduling tool from Network Solutions, you can still add Scheduling to your website by copying and pasting an embed code from Scheduling.
- Log in to your https://www.networksolutions.com/my-account/login.
- In your Account Manager, go to Websites:
- You will be redirected to the Website Builder automatically if you only have a single Website or eCommerce plan.
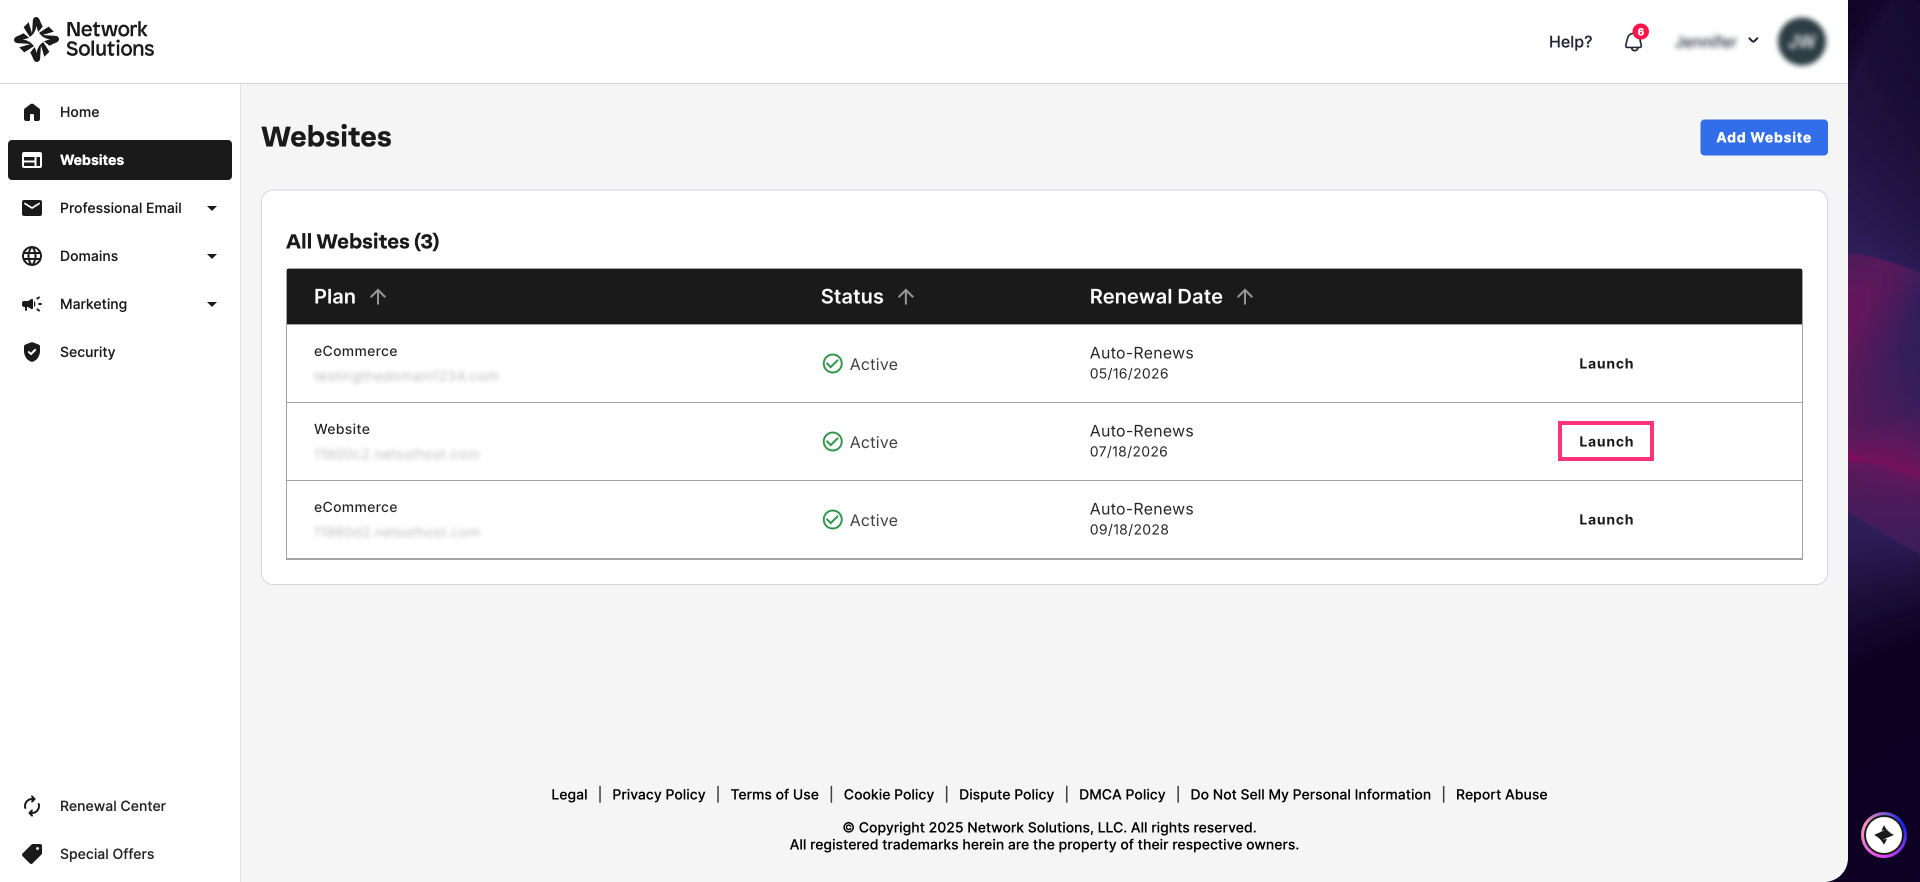
- If you have more than one Website or eCommerce, you will need to select the website you want to manage first and click Launch:
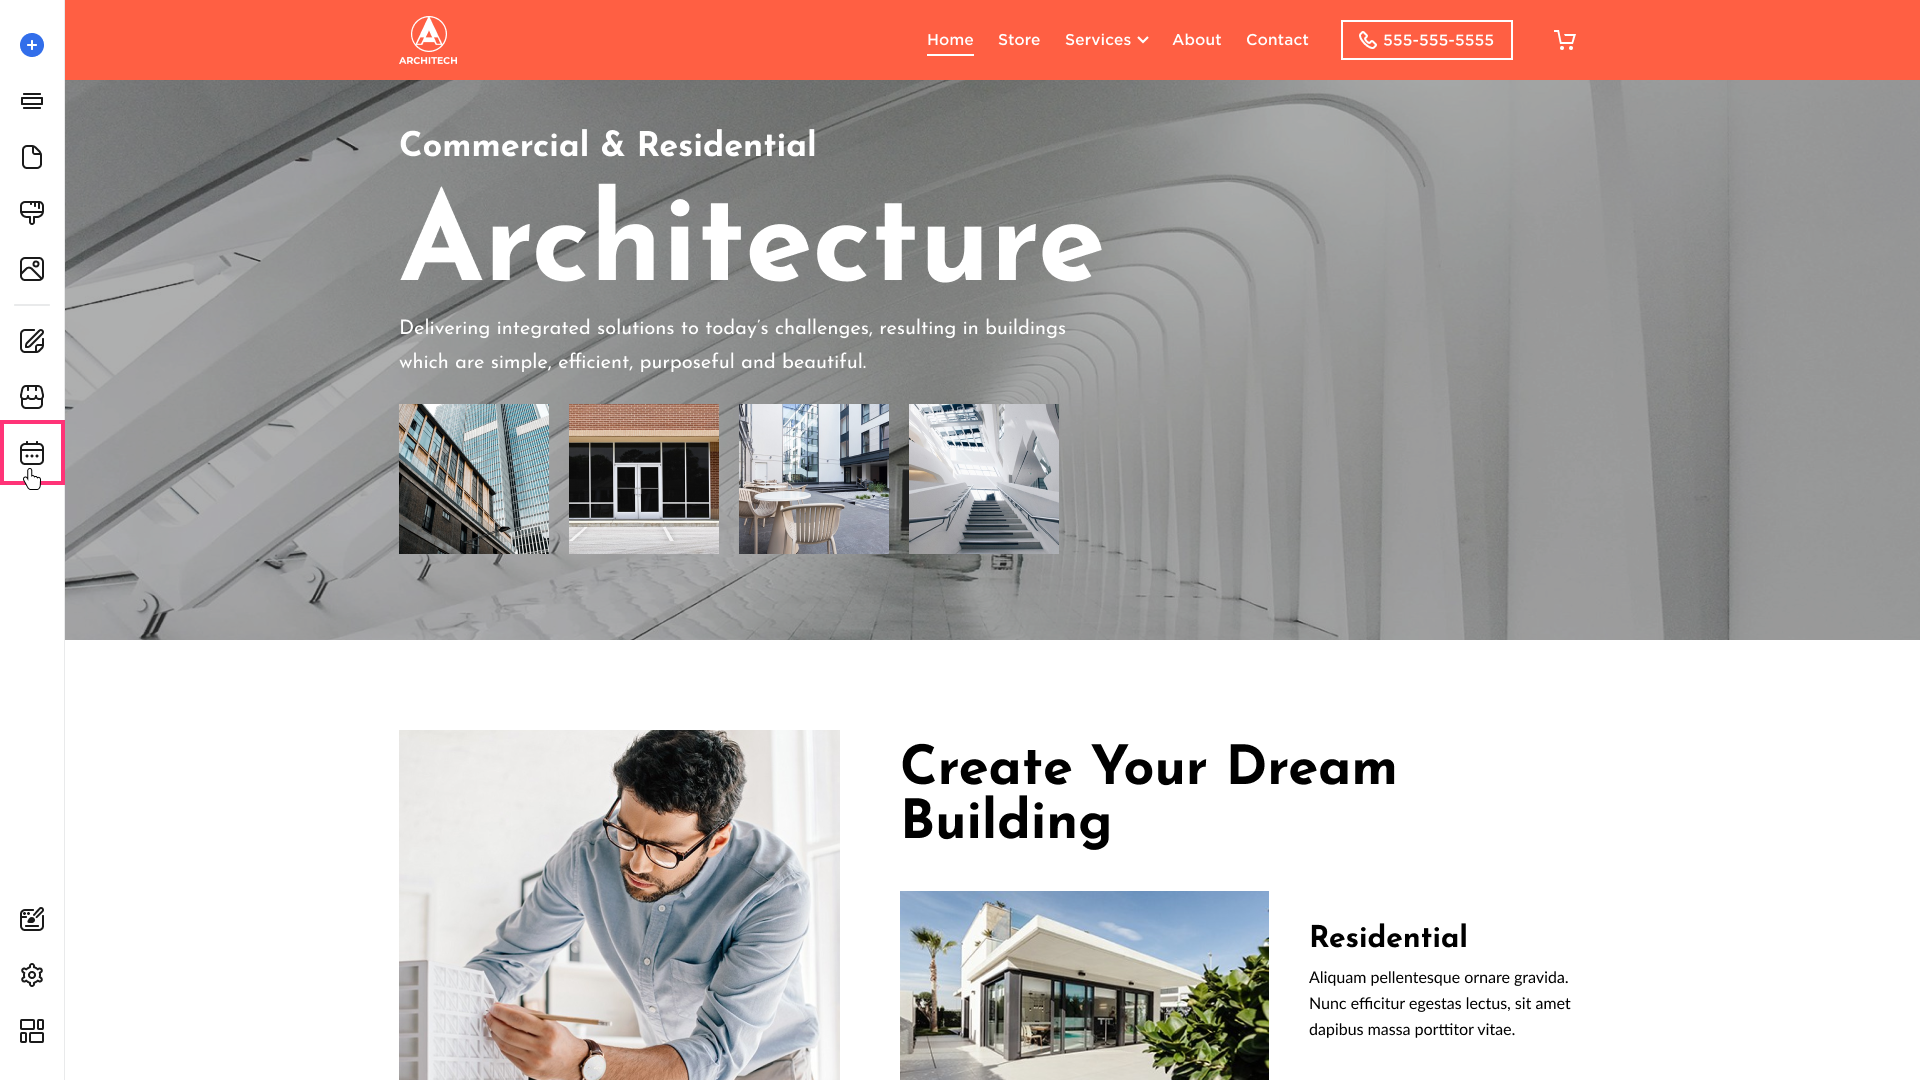
- In the Website Builder, click the Appointments icon on the left sidebar.
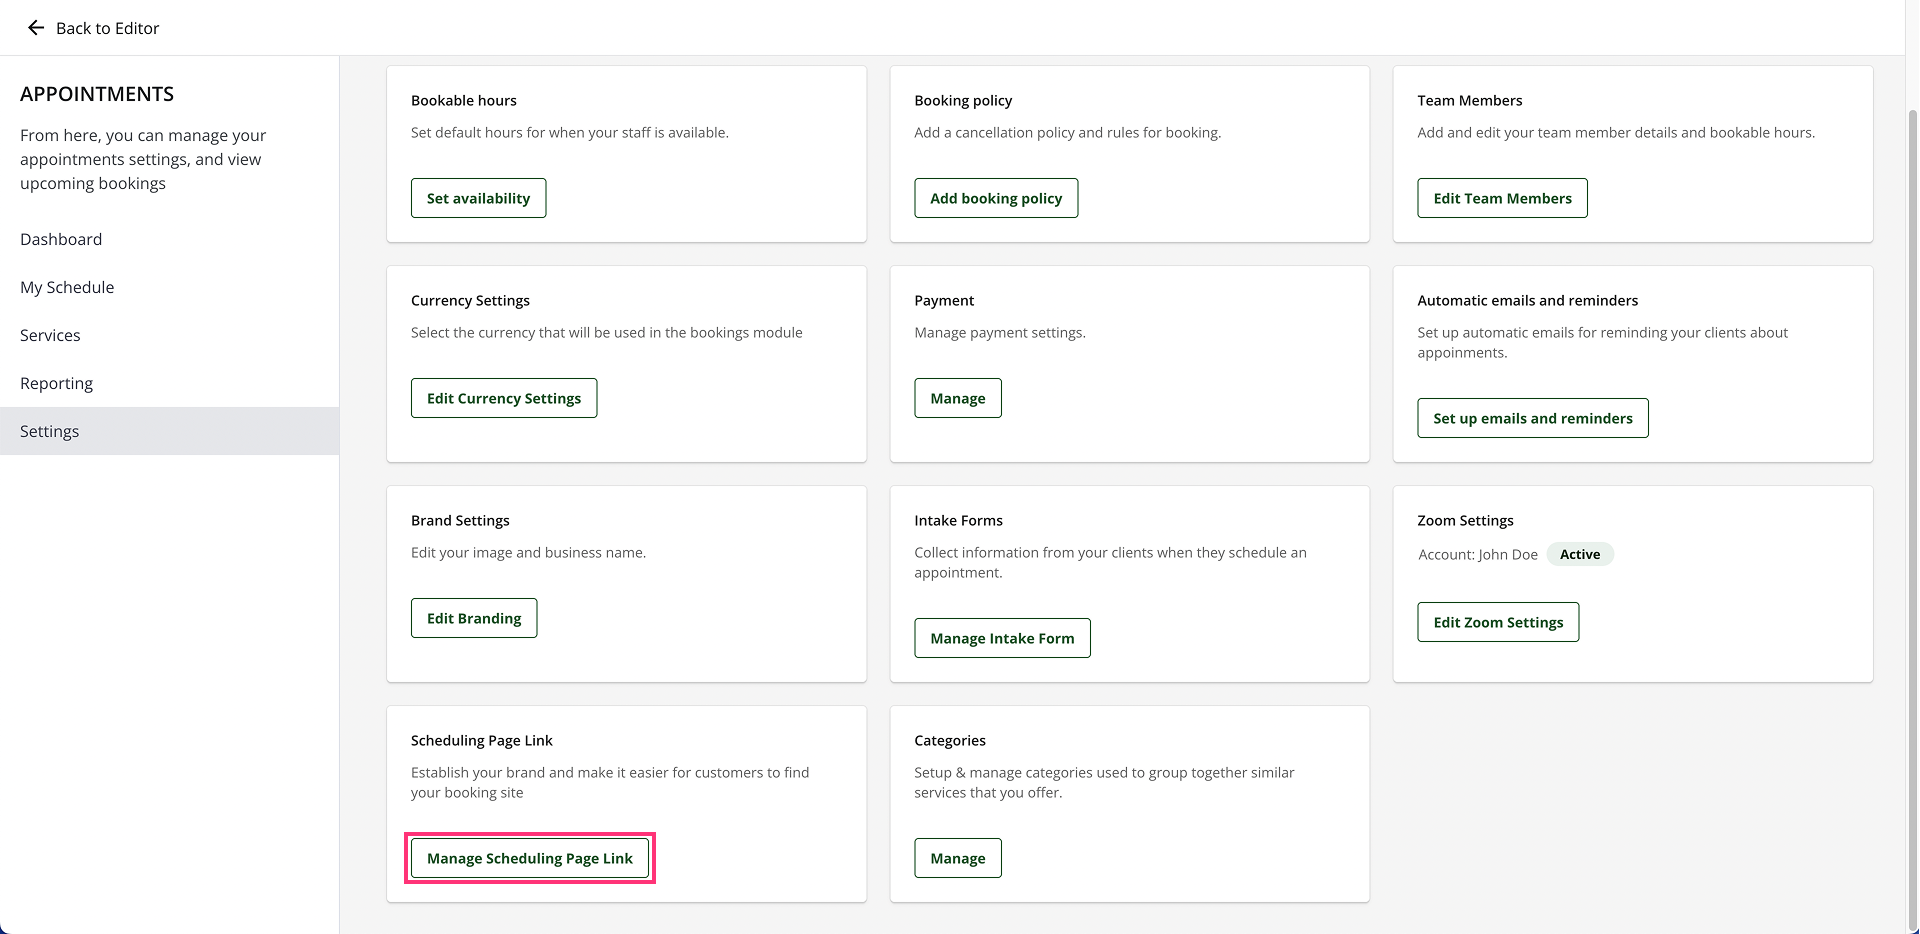
- Select Settings in the left sidebar, click the Manage Scheduling Page Link button:
- Next, go to Embedding:
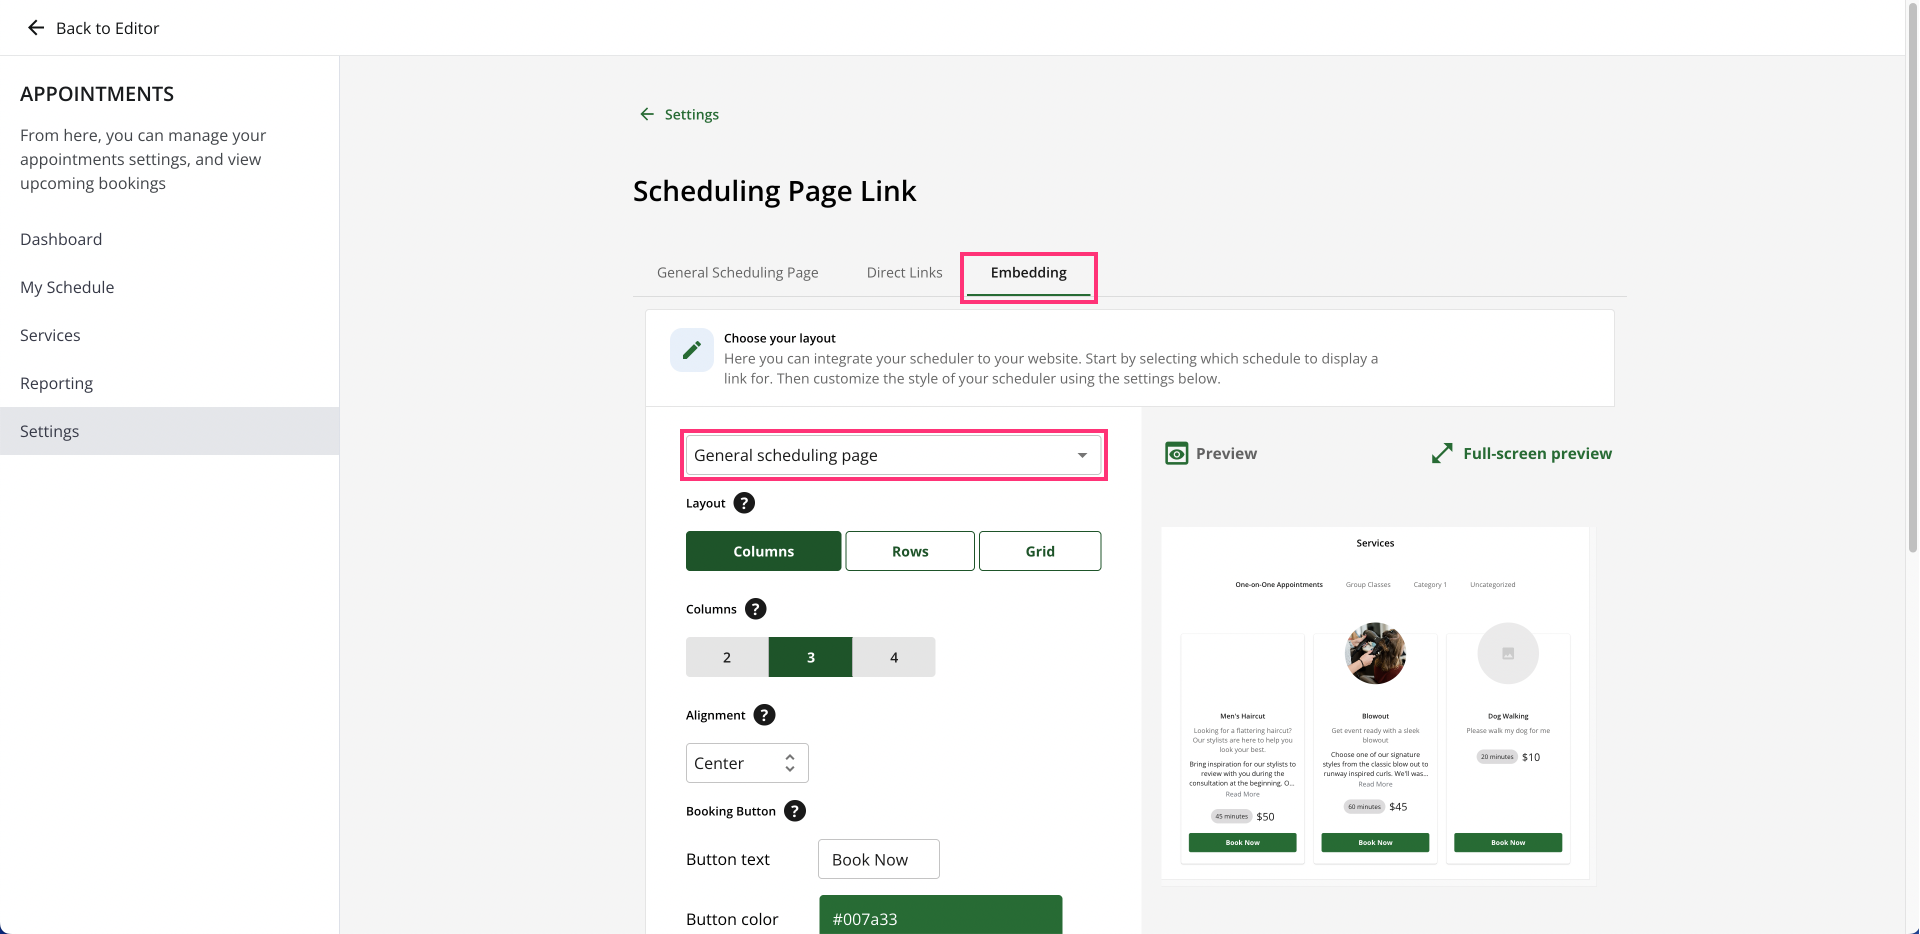
- You will have the following options to update your scheduling page:
Please Note: While editing your scheduling page, you will see a Preview on the right to see how your page will look on your website when successfully added.
- Click on the drop-down box on the top-left to select the page you want to add to your website.

- Under Layout, you can edit the orientation of how your services will be listed on your website. Choose Columns, Rows, or Grid. If you select Columns, you can choose the number of columns in each row of services.

- Choose Center, Left, or Right under Alignment to set how you want to align your content for each service.

- Edit the button text and color according to your preference. This is the button that customers will click to book a service.

- Select elements to show on your scheduling page by turning the toggle switch on/off for Image, Title, Short description, or Long description.

- Once you have created your scheduling page, generate the embed code. Scroll down and click Generate Code.

- The empty field will show an HTML code you can embed on your website.

- Click Copy to copy the code to your clipboard.
You will use the code to add the scheduling page to your website. For steps on embedding the code into your website, please contact your current hosting/website provider for help.
Review
You can seamlessly add a Scheduling to your website by following these steps and referencing the provided customization options. This empowers website visitors to conveniently book appointments directly through your platform, streamlining the scheduling process for you and your clients. Remember, contacting your site hosting provider is recommended for assistance with embedding the code itself.