.png)
How to Update Scheduling Settings
Do you need to fine-tune your experience with our online appointment scheduling tool? Whether you want to customize or change your Scheduling settings, you've come to the right place. This guide simplifies updating your Scheduling settings, empowering you to streamline your online booking experience. Whether you want to adjust bookable hours, customize booking policies, or manage team schedules, this walkthrough equips you with the knowledge to update your Scheduling settings and optimize your appointment bookings effortlessly.
Table of Contents
Update Scheduling Settings
- Log in to your account via https://www.networksolutions.com/my-account/login.
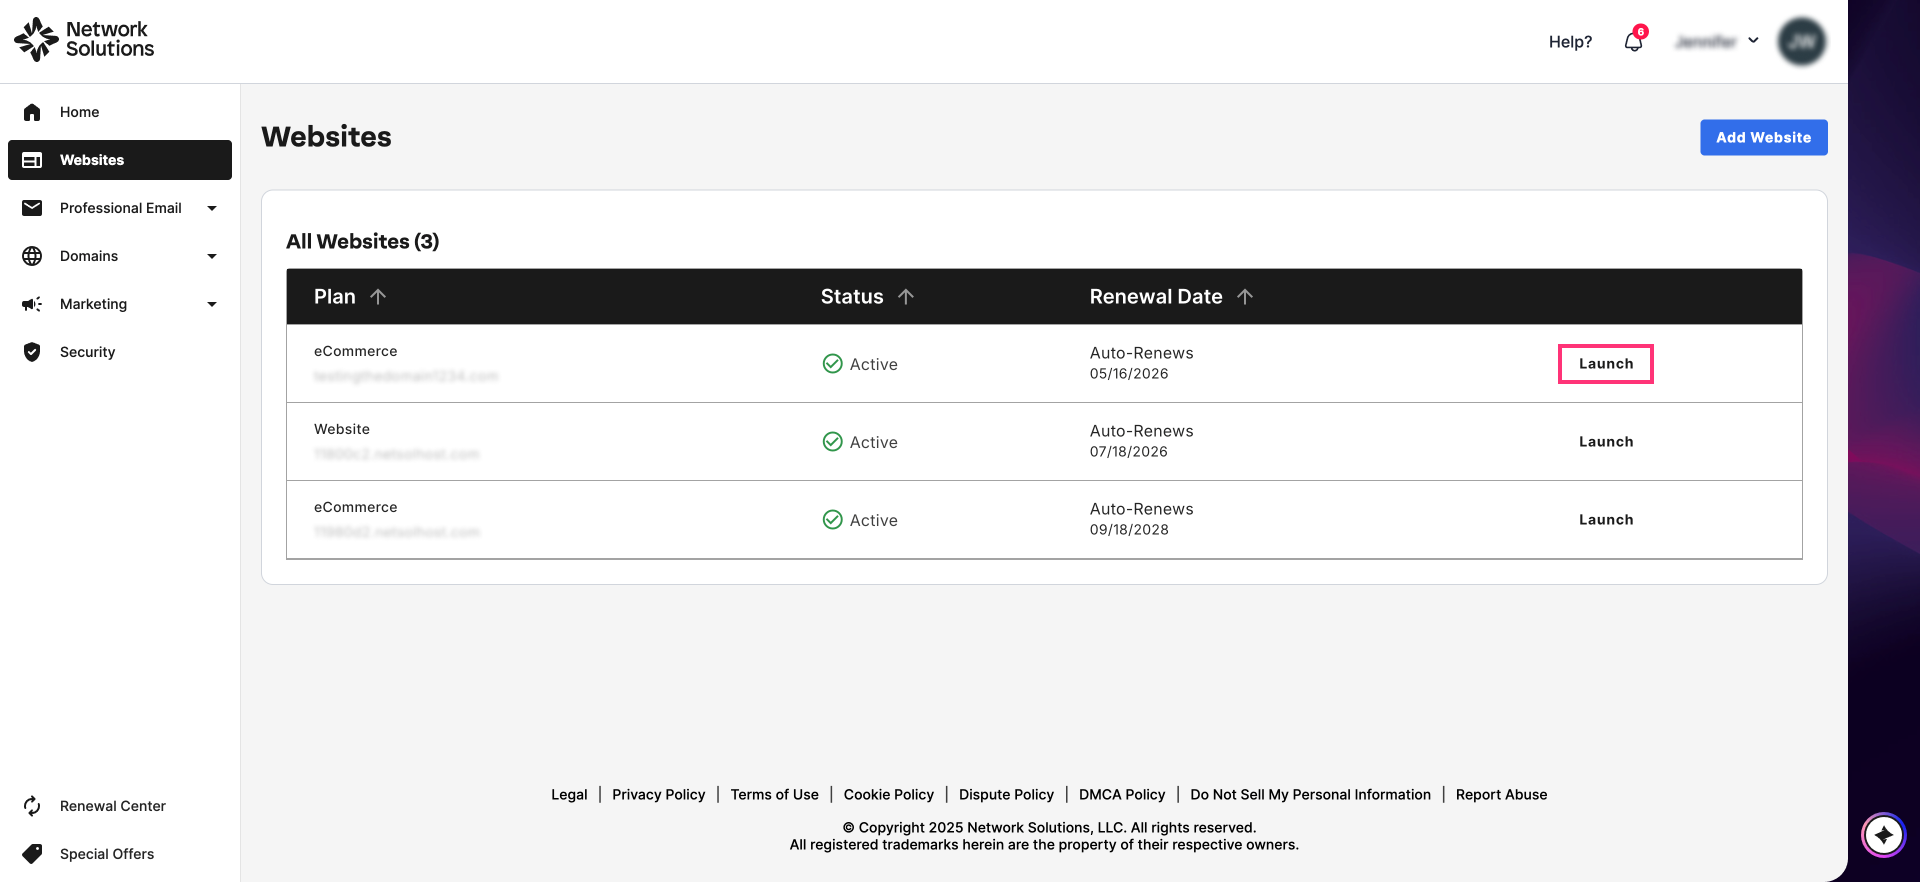
- In your Account Manager, click Websites on the left side of the page:
- You will be redirected to the Website Builder automatically if you only have a single Website or eCommerce plan.
- If you have more than one Website or eCommerce, you will need to select the website you want to manage first and click Launch:
- In the Website Builder, click the Appointments icon on the left sidebar.
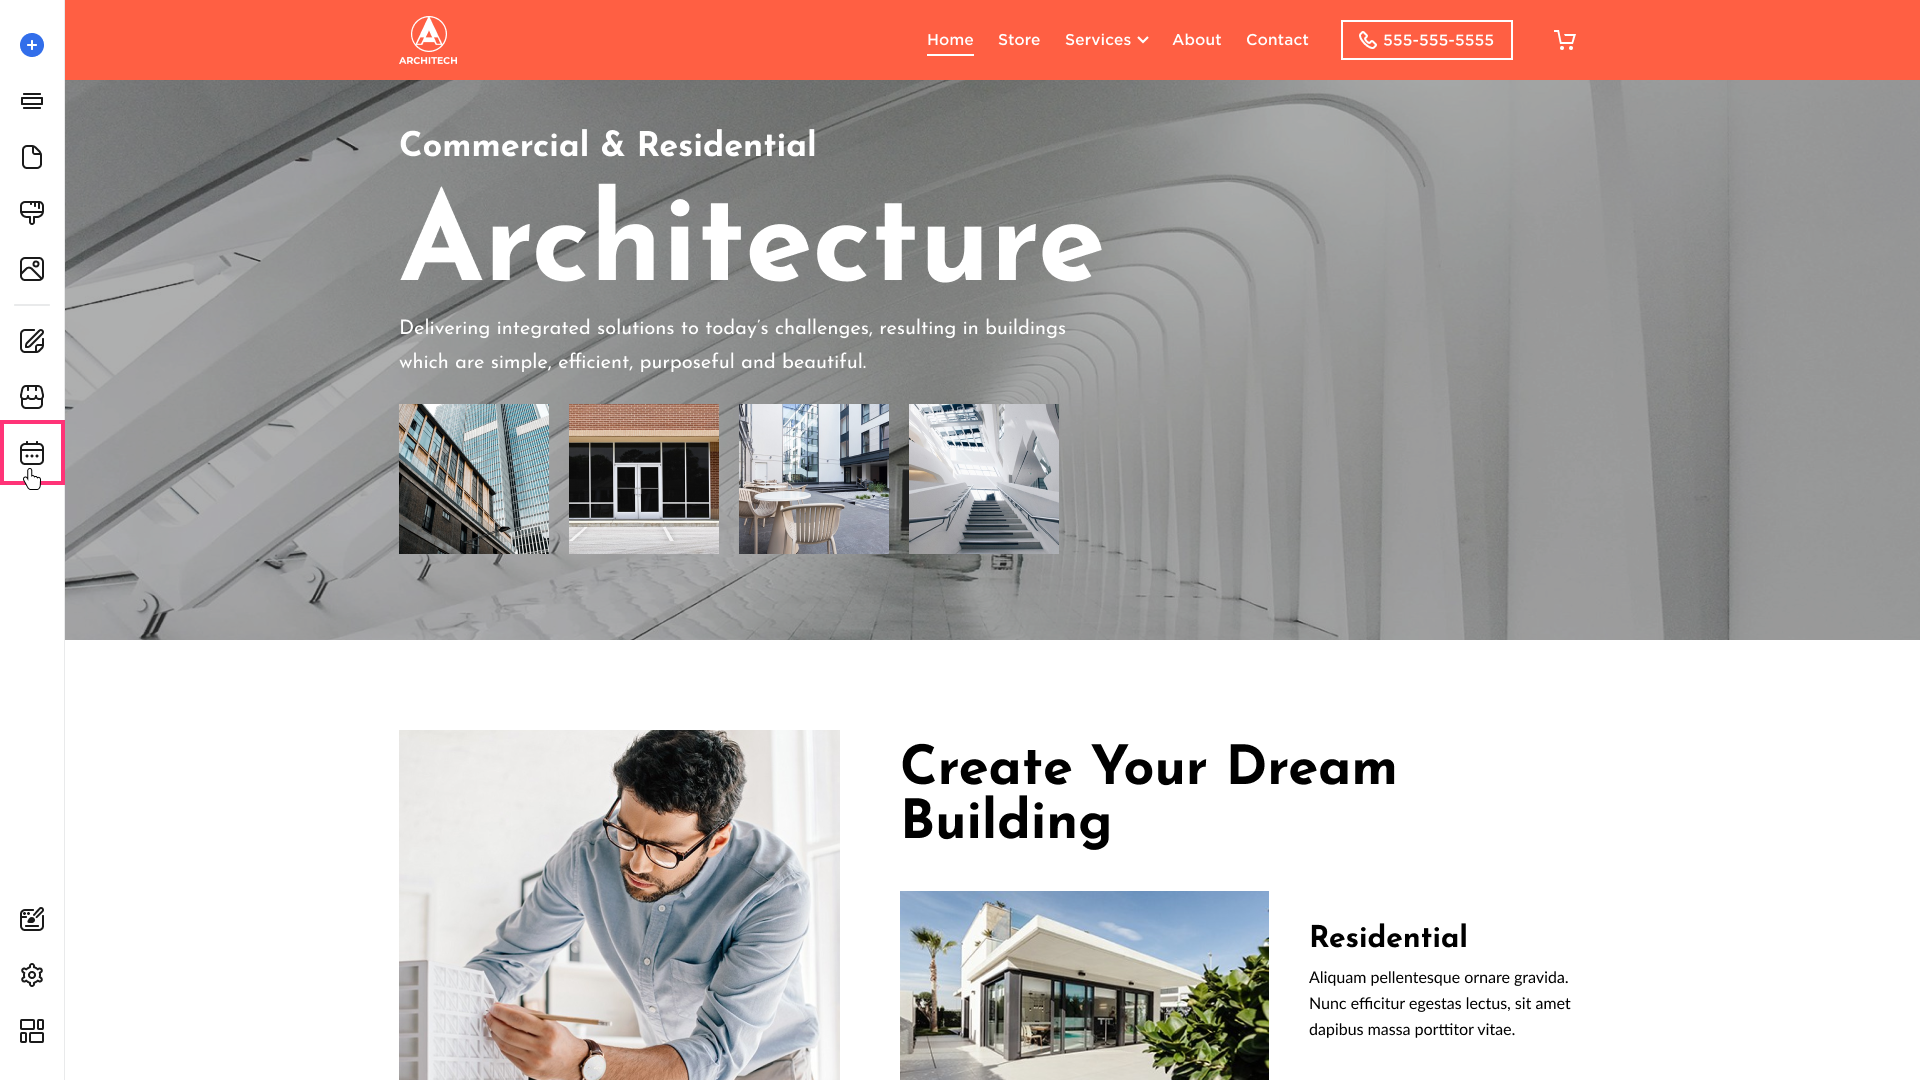
- From the Settings section, you can update the following:

- Bookable hours – set the default hours for when your staff is available. These are the hours you allow booking for your staff and services.
- Booking policy- this is where you can update the following:
- Booking rules (Days/Hours/Minutes)
- Limit early bookings – you can set how far in advance clients can start booking.
- Limit late bookings – you can set when clients can book a session at the latest.
- Cancellation policy – you can set how close to the start time clients can cancel.
-
Time Slots – customize how available time slots will be displayed for your clients. You can set it based on the service duration or specific minute intervals.

- Booking rules (Days/Hours/Minutes)
- Team Members - add and edit your team member details and their bookable hours.
- Currency Settings - select the currency that will be used in the bookings module.
- Payment Method - set up payment integrations to accept online payments.
- Automatic emails and reminders – set up automated emails to remind your clients about appointments. These automated emails include:
- Confirmation emails
- Cancellation emails
- Reminder emails
- Update emails
- Successful Checkout emails


- Brand Settings – edit your Brand Details, such as your business name, phone number, and image.

- Intake Forms – collect information from your clients when they schedule an appointment.

- Zoom Settings – connect and use Zoom with Booking workflows.

- Scheduling Page Link - make it easier for customers to find your booking site. On this page, you can do the following actions:
- Copy the link to your General Scheduling Page
- Create Direct Links for individual service types
- Generate an embedded code to integrate your scheduler into your website

- Categories - setup & manage categories used to group together similar services that you offer:

Review
Empower Your Schedule with Scheduling! By following these steps, you've successfully unlocked the ability to change or update Scheduling settings. This empowers you to customize your scheduling experience to perfectly suit your business needs.
Ready to take your scheduling to the next level? Utilize Scheduling an extensive range of settings to streamline your workflow, improve client communication, and ultimately, grow your business.