.png)
How to Add Xero for eCommerce Store
Learning to add Xero to eCommerce is a simple process. Xero helps manage finances through invoicing, inventory management, bank reconciliation, and payroll. It provides real-time visibility of your financial position. Understanding Xero integration with website platforms can simplify financial management for online stores.
Table of Contents
Add Xero to eCommerce
Follow these steps to add Xero to eCommerce and integrate your finances more efficiently:
- Log in to your account via https://www.networksolutions.com/my-account/login.
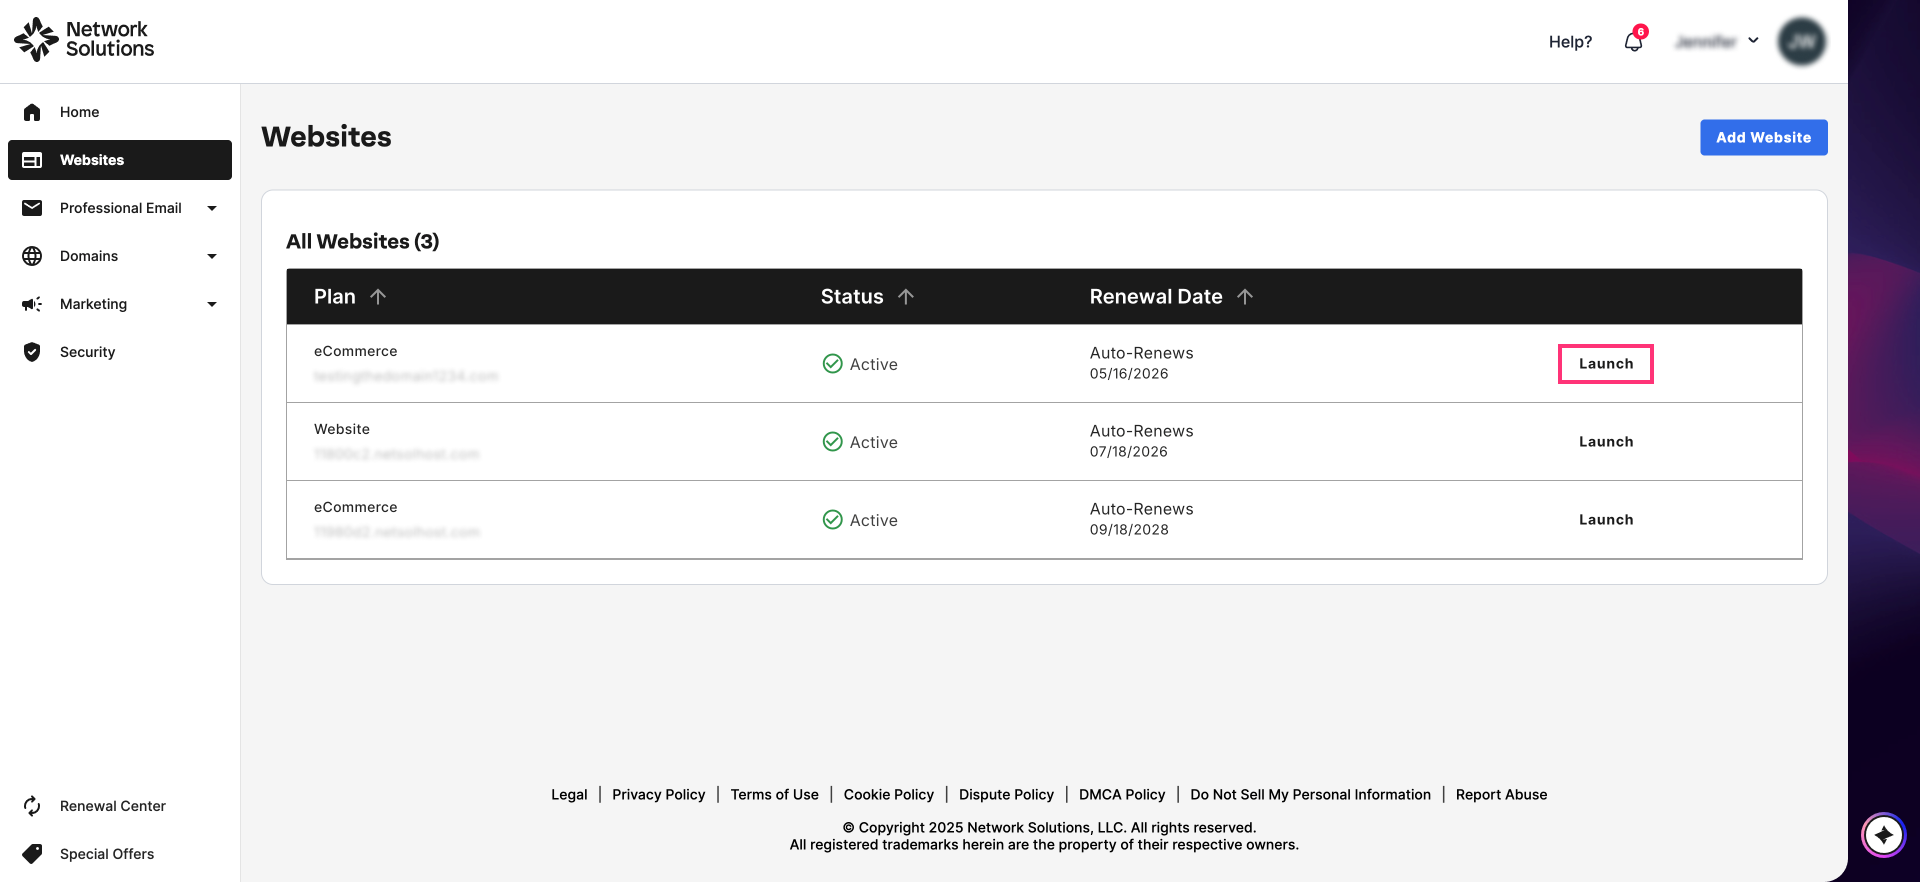
- On your Account Manager homepage, click Websites on the left menu.
- If you only have one package, you will be automatically redirected to yourWebsite Builder.
-
If you have multiple packages, click Launch next to the eCommerce product you want to manage.
- Once you have accessed your Website Builder, click Store on the left sidebar.


- In the Settings section, navigate to the Accounting card, then click the Manage button:

- Click the Connect Accounting System button:

- On the Add New Accounting System page, click Connect to Xero:

- Follow the Xero Integration Instructions listed on the screen:

Once you have been through the simple integration of Xero into your eCommerce platform, you can now fully unlock all its powers. In this regard, here's what it has in store for you: for more details and support, head over to the Xero website or reach out to their customer support team
Review
Integrating Xero into your website offers numerous benefits, including improved financial visibility, simplified invoicing, and seamless bank reconciliation. By following this guide, you can easily add Xero to eCommerce and start reaping these advantages.