.png)
How to Manage Your Order Export Feed for eCommerce Store
Learn how to improve your order fulfillment process with our guide on how to manage Order Export Feed. You'll find step-by-step instructions for integrating your dropship suppliers or 3PLs into your Network Solutions' eCommerce store, which will help ensure accurate and timely order delivery.
Mastering Order Export Feed management can optimize website essentials and enhance customer satisfaction.
Table of Contents
- Manage Order Export Feed
- Create Dropship Warehouse
- Set Up Order Export Feed
- Set Tracking Import Feed
- Review
Manage Order Export Feed
You can manage Order Export Feed to send new sales orders to your dropship supplier or 3PL for fulfillment. To create an order feed, you will need to ensure your supplier is compatible with Dropshipper.
Once you have confirmed that your dropship supplier is compatible, you can connect them to your new eCommerce solution. We organize dropship suppliers as warehouses, which means you will need to create a separate warehouse for each drop shipper.
Create Dropship Warehouse
To create a dropship warehouse, please follow the steps below.
- Log in to your account via https://www.networksolutions.com/my-account/login.
- On your Account Manager homepage, click Websites on the left menu.
- If you only have one eCommerce package, you will be automatically redirected to your Website Builder.
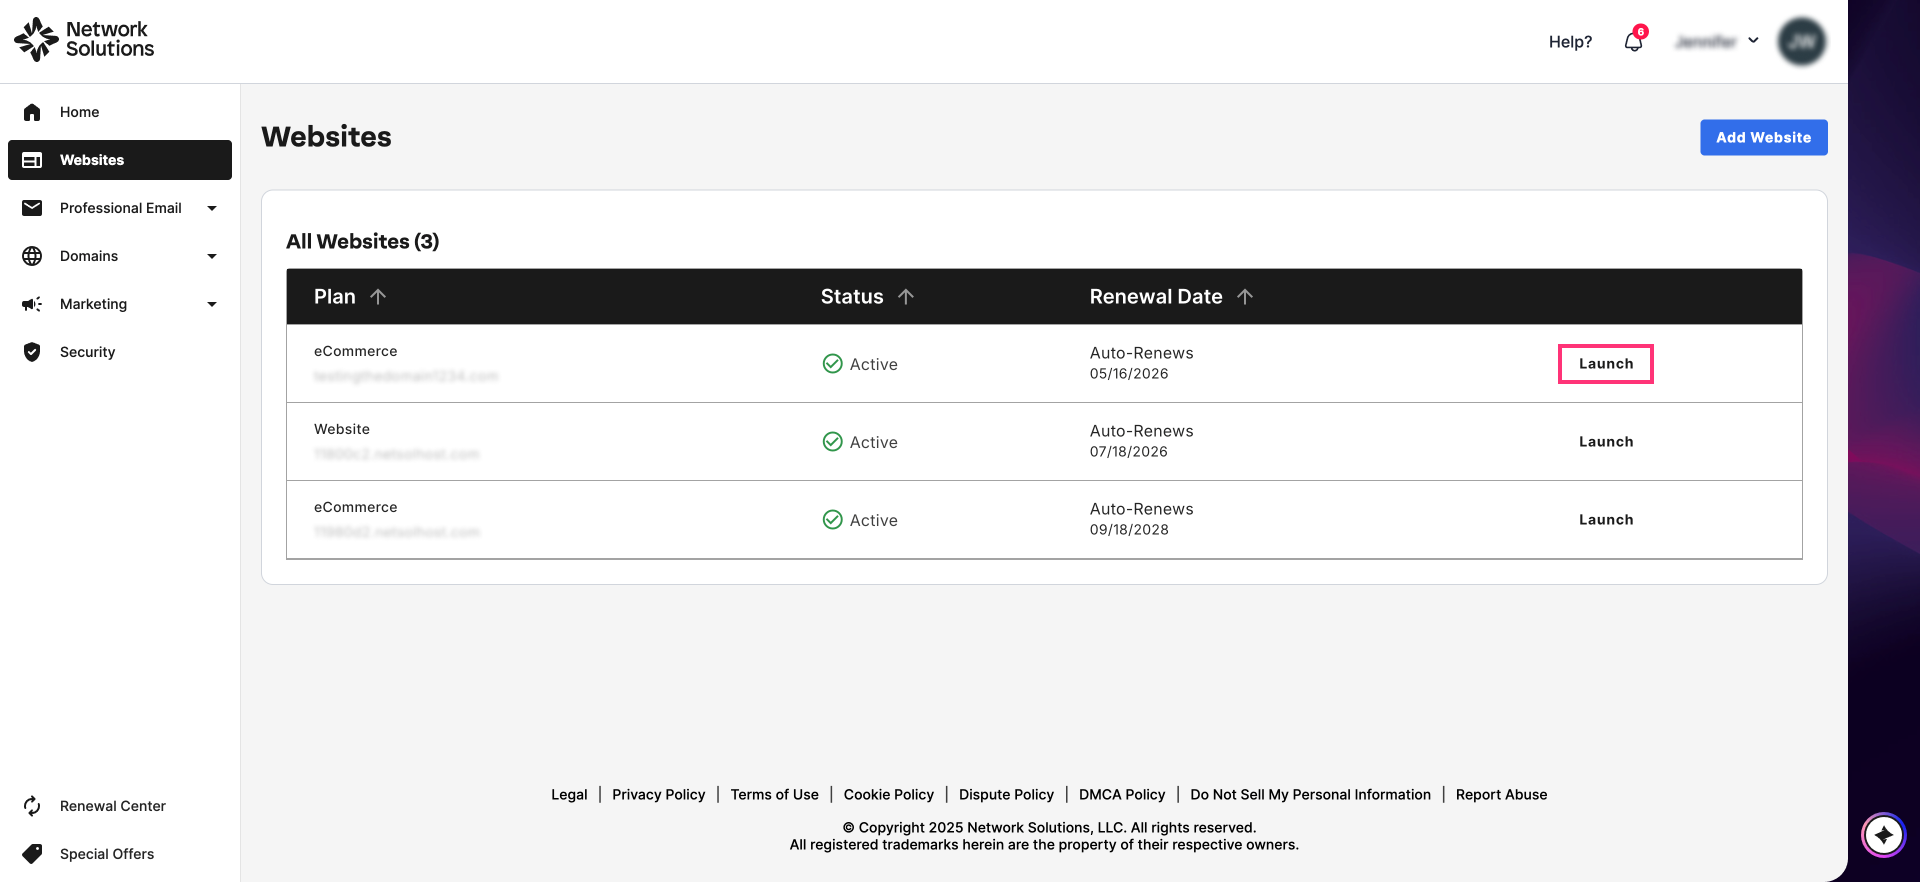
-
If you have multiple packages, click Launch next to the eCommerce product you want to manage:
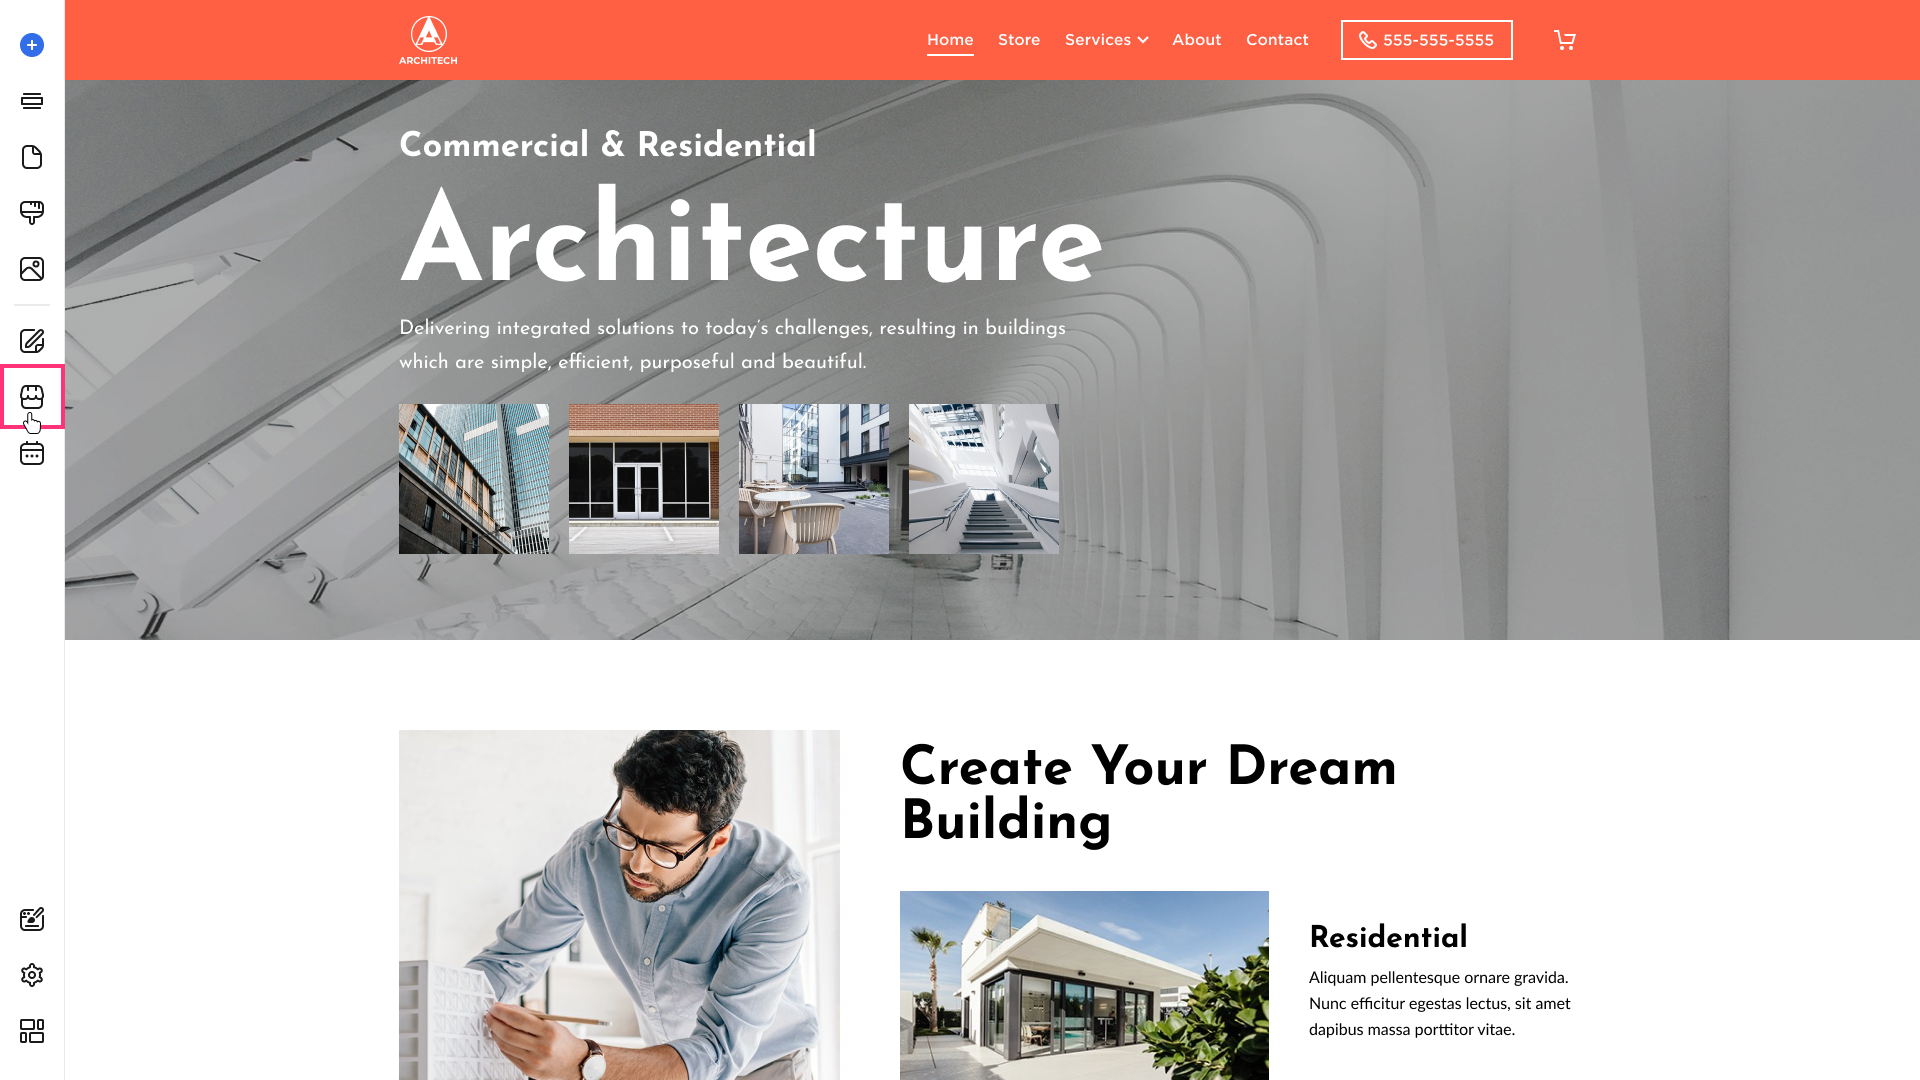
- Once you have accessed your Website Builder, click Store on the left menu.

- If you haven't activated Fulfillment Automation yet, navigate to the Add-ons card and click Manage. If Fulfillment Automation has been activated, skip to step 7.

- In the Add-ons section, find the Fulfillment Automation card and click Learn More.

- Confirm by clicking the Activate button.

- Return to the Settings section, find the Warehouses card and click on the Manage button:

- Click the Create Warehouse ▼ button on the upper right side, then select Integrated from the drop-down:

- A new pop-up will appear. Enter the name of a new warehouse and click the Next button.

- Under the Basic Information tab, input all the necessary warehouse details to proceed.
- General Section - Enter the Warehouse Name, Account Number, Warehouse ID, and Warehouse Type:
- Warehouse Address - Enter the Complete Address, such as the Street Address, City, Postal Code, State, and Country.
- Contact Information - Enter the Phone number, Email Address, and Fax number:
-
Notes - You may enter any related Warehouse information. This could help by putting important highlights for the warehouse details:

- Click the Save button.

Set Up Order Export Feed
To set up an Order Export Feed, please follow the steps below.
- Log in to your account via https://www.networksolutions.com/my-account/login.
- On your Account Manager homepage, click Websites on the left menu.
- If you only have one eCommerce package, you will be automatically redirected to your Website Builder.
- If you have multiple packages, click Launch next to the eCommerce product you want to manage.
- Once you have accessed your Website Builder, click Store on the left menu.
- In the Settings section, find the Warehouses card and click on the Manage button:
- Click the vertical ellipsis next to the warehouse under the Actions column, then select Details.

- In the Order Export tab, hit the Automation Settings button:

- Enable the Auto Export Sales Orders:

- Then, select your desired Timing and Integration Interval from the drop-down ▼:

- If you choose Specific Time(s), click the drop-down ▼ to set your preferred Scheduled Times:

- Enter your File Preferences:

- Choose the preferred Text File Delimiter by clicking the drop-down ▼ icon.

Please Note: You can test the integration to see if we can connect with the source (FTP, for example) and see if the credentials work. You can click Test Integration to verify the credentials you entered are successful. This ensures we can connect with your source (i.e., FTP). If the test fails, verify the credentials you entered and test again.
- Click the Save button in the lower right corner of the Warehouse Integration pop-up settings.
- You may now click the Add Attributes button right next to Automation Settings.
Please Note: By configuring the Add Attributes section, you will see all the data points that your account can include in the file. Your dropship supplier will determine these data points and their order. For example, the dropship supplier wants the shopper's name in column one and the 'ship to' postal code in column 2.
Set Tracking Import Feed
Once you have set up the Order Export, follow these steps to set up the Tracking Import Feed.
- Log in to your account via https://www.networksolutions.com/my-account/login.
- On your Account Manager homepage, click Websites on the left menu.
- If you only have one eCommerce package, you will be automatically redirected to your Website Builder.
- If you have multiple packages, click Launch next to the eCommerce product you want to manage.
- Once you have accessed your Website Builder, click Store on the left menu.
- In the Settings section, find the Warehouses card and click on the Manage button:
- Click the vertical ellipsis next to the warehouse under the Actions column, then select Details.
- In the Tracking Import tab, hit the Automation Settings button:

- Enable the Auto Export Sales Orders:

- Select your desired Timing and Integration Interval from the drop-down ▼:

- If you choose Specific Time(s), click the drop-down ▼ to set your preferred Scheduled Times:

- Choose the preferred Text File Delimiter by clicking the drop-down ▼ icon:

- Click the Save button on the lower right corner of the Warehouse Integration pop-up settings.
- You may now click the Add Attributes button right next to Automation Settings:

Please Note: Configuring the Add Attributes section will allow you to create the format for the CSV/other files that you get from the FTP Site.
13. Click the Save button once done.
Review
Remember the information to effectively manage your order export feed and ensure seamless communication between your eCommerce store and your dropship suppliers:
- Create a dropship warehouse.
- Set up order and tracking feeds.
- Carefully configure your automation settings.
Following these steps can streamline your fulfillment process and provide a better customer experience.