.png)
How to Create Parent Product or Product Variations in eCommerce
Tired of managing a maze of individual listings for your products? Streamline your eCommerce store and enhance customer experience with parent product listings. This powerful tool allows you to group variations like color, material, finish, storage, style, length, stain, size, etc., under one central listing, making it easier for customers to find what they're looking for. This can also help your brand stand out and increase sales. Whether you're launching something new or improving your current offerings, understanding how to create parent products and product variants can give you an edge in the competitive digital marketplace.
Table of Contents
Create Parent Product
You can add product variants to your eCommerce store since it is essential when you have items with more than one option. Follow the steps below to create product variants.
- Log into your account via https://www.networksolutions.com/my-account/login.
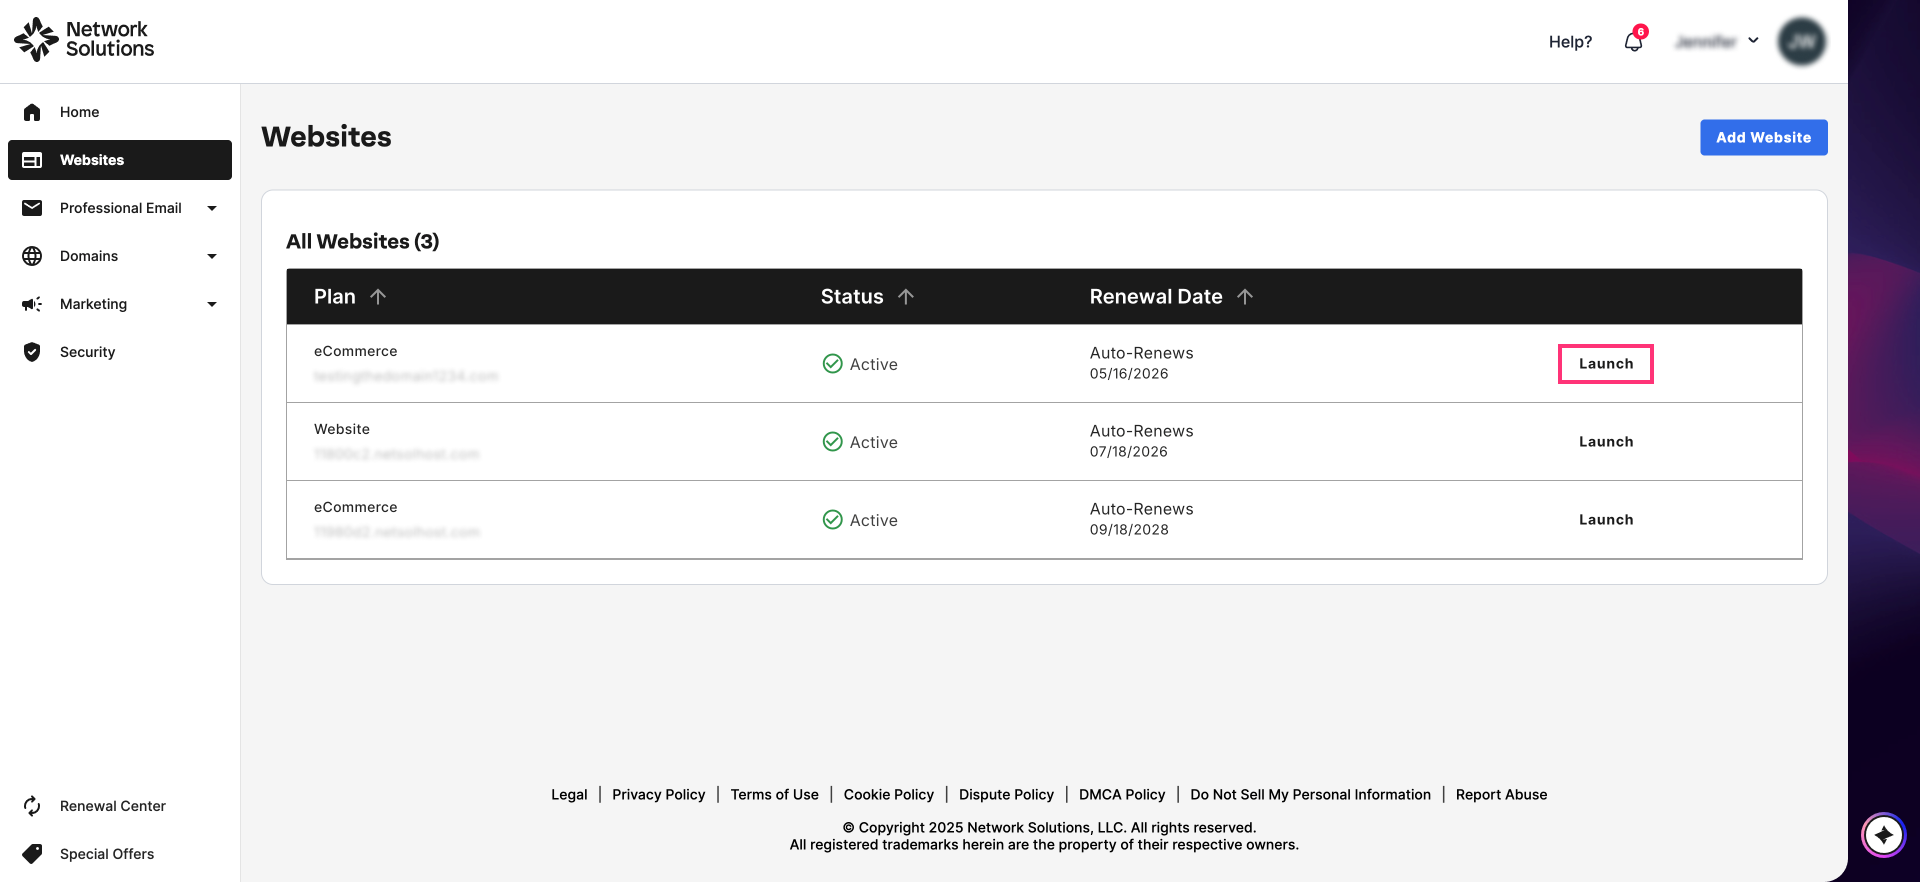
- In your Account Manager, select Websites on the left side of the page:
- If you have one eCommerce product, you will be redirected to your Website Builder.
-
If you have more than one eCommerce product, you will see a list of your eCommerce products. Click Launch next to the product for which you would like to create a Parent Product.

- Once inside your Website Builder, click Store on the left sidebar.

- In the Products section, hit Create Product, which is located in the upper-right-hand corner.
- Select Product from the dropdown.

- Enter the product name, a unique SKU number, Quantity, and Price. Click Manage Product in the Add Product dropdown.

Basic Information Tab
Fill out the fields in the Basic Information tab and click Save.
- Product Card – Edit or change the Product Name and add images.
-
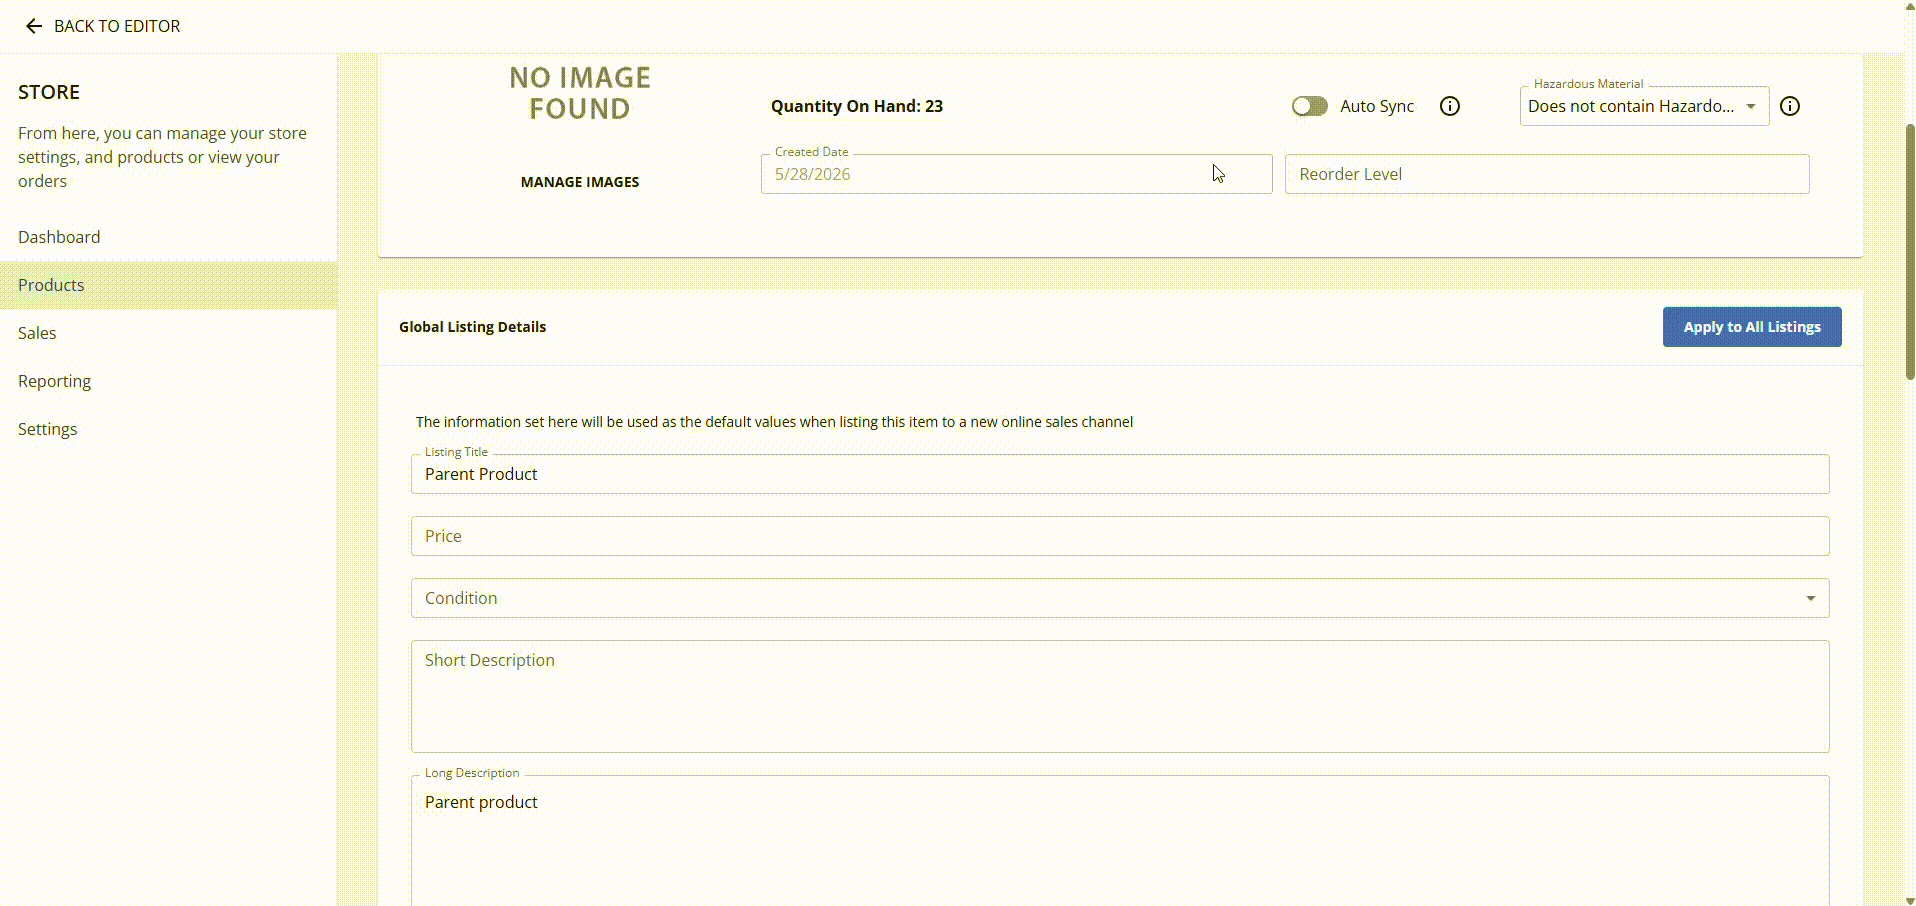
Global Listing Details – Provide details such as Listing Title, Price, Product condition, and a description (short and long).
Note: The Price field is essential for setting a base price for this product. This price will be used as the foundational price for all variations of this product. You can update this or any variation price at any time. - Dimensions – Enter measurements such as length, width, and weight.
- Warehouse - Select the warehouse to track inventory levels accurately.
- Supplier - Select the product supplier, add supplier SKU, Target Inventory Level and Unit Cost if needed.
- Identifiers - optionally add identifiers, such as UPC, GTIN, ISBN, EAN.
- Manufacturing - optionally add manufacturing information.
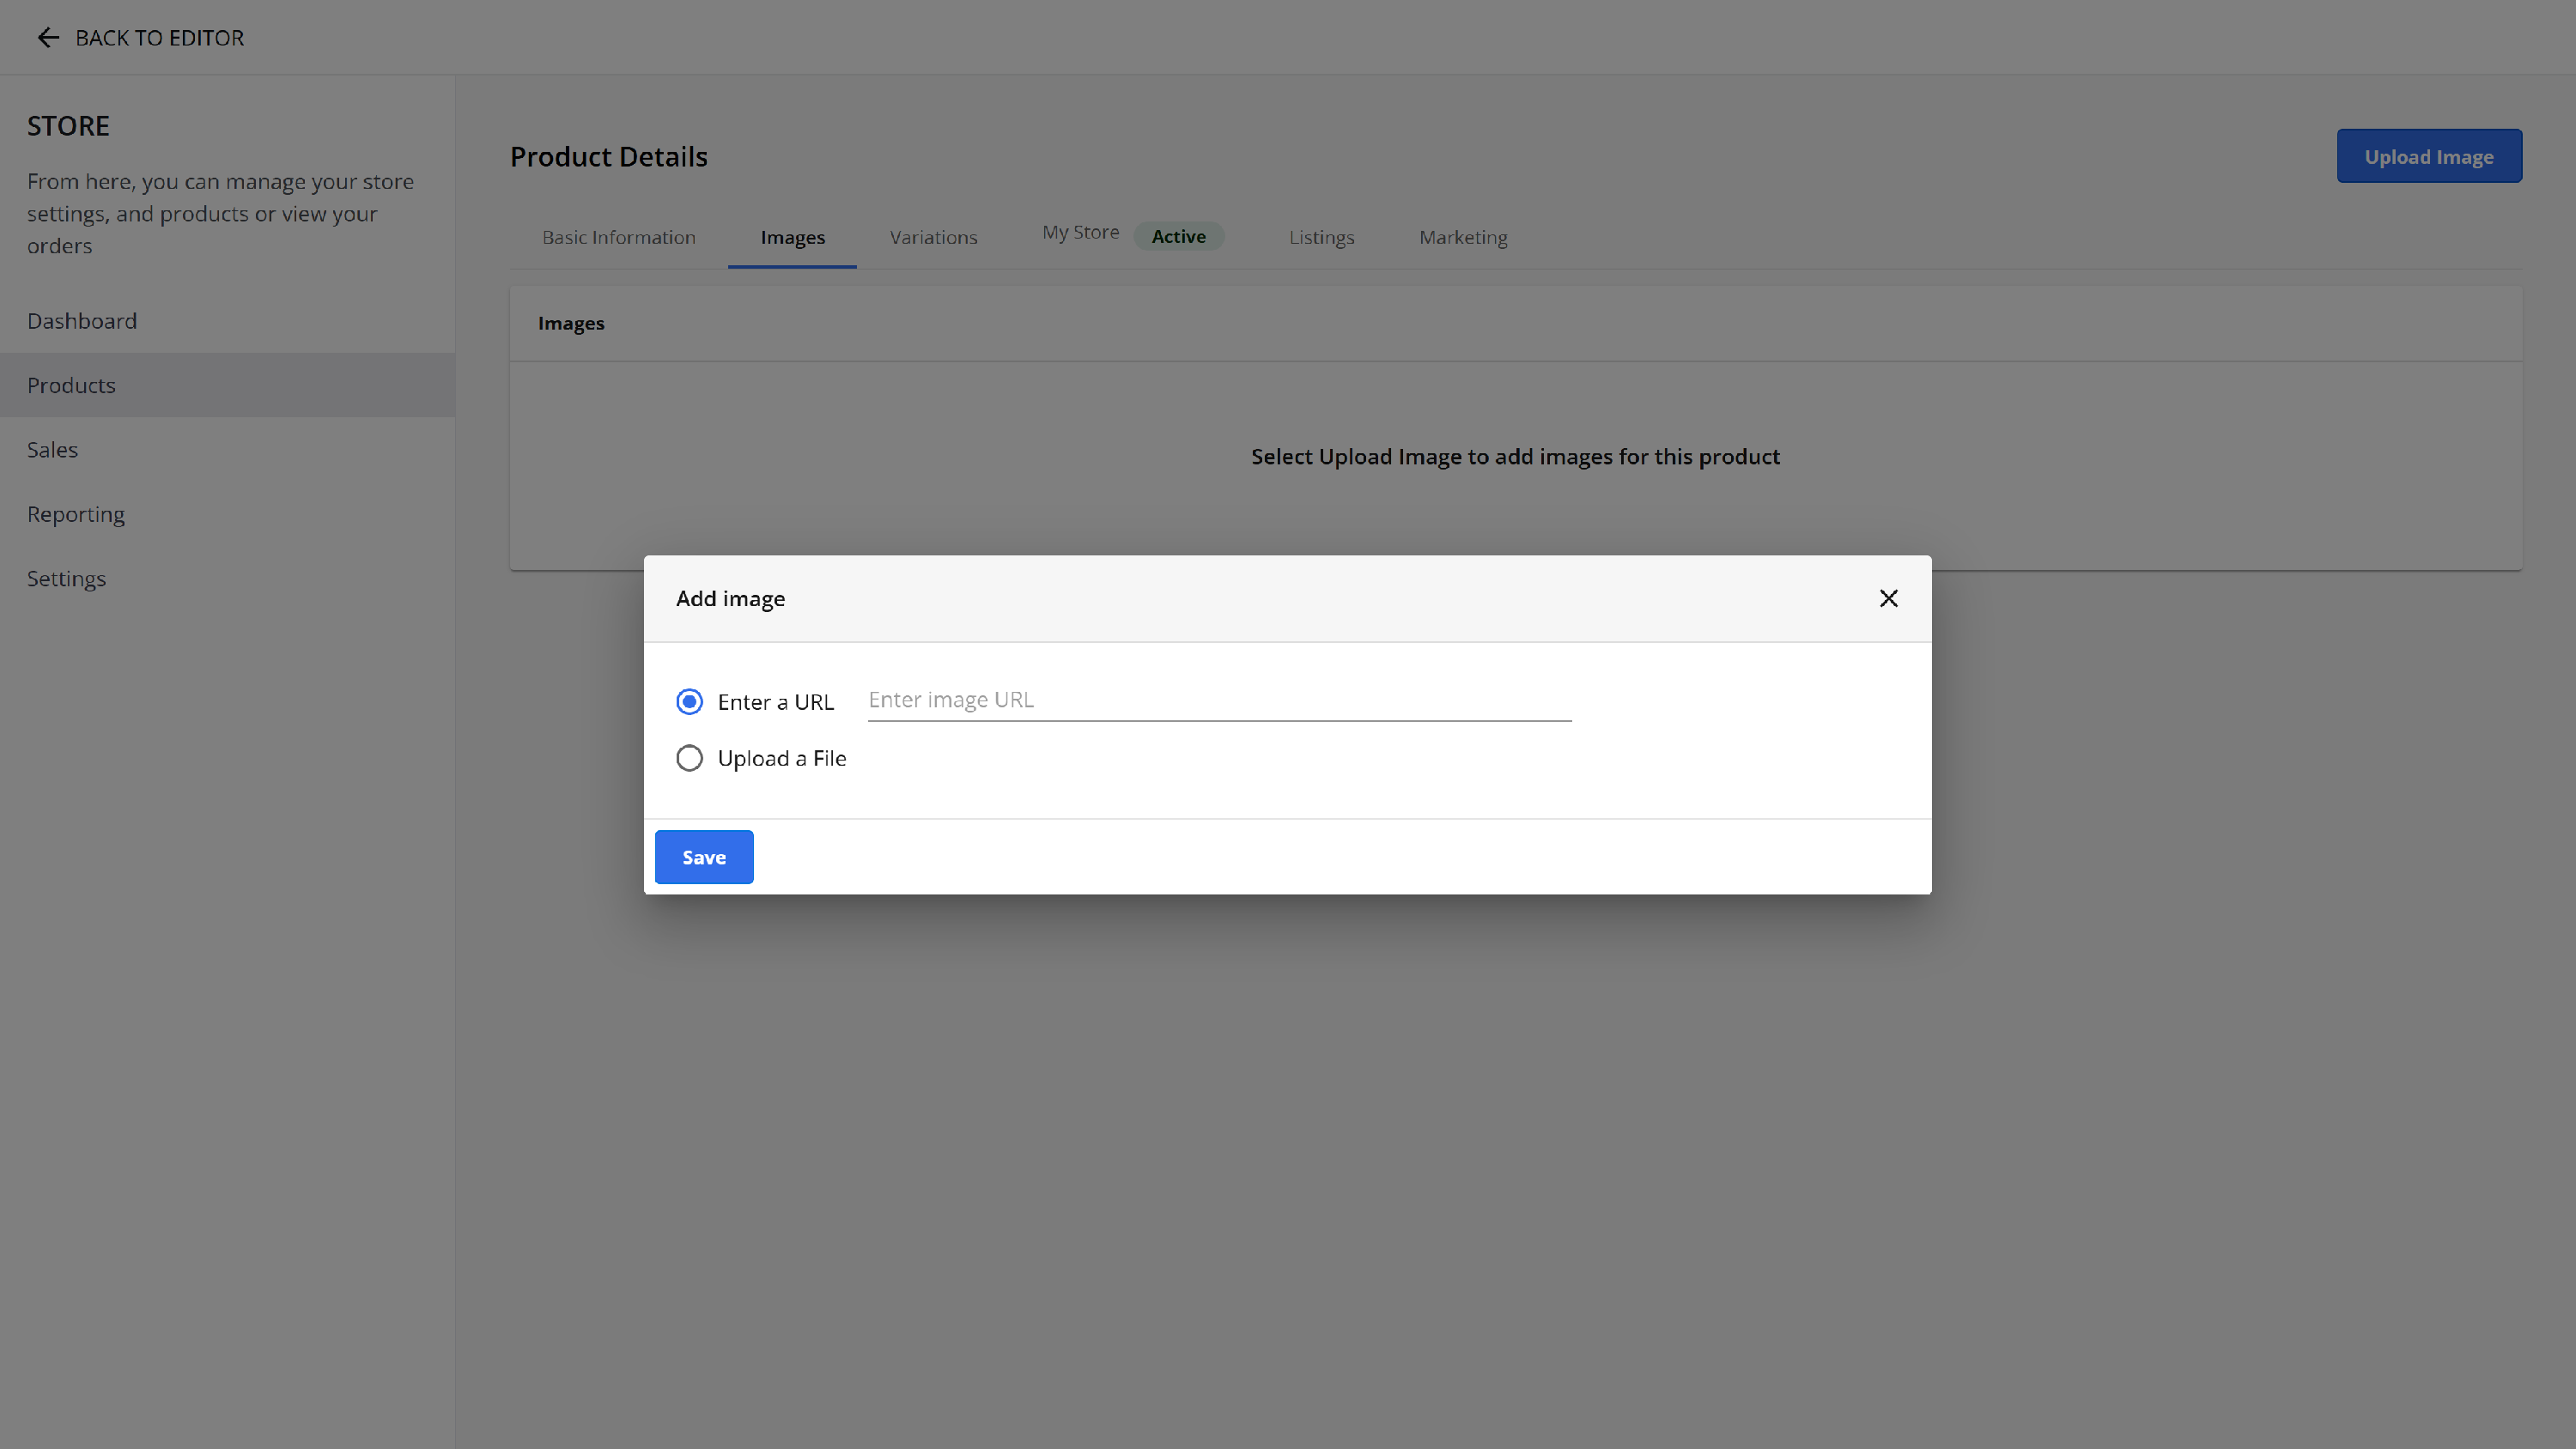
Images Tab
Manage the images for the parent product here. If you have multiple photos to add, you can skip this tab for now and add all the images at one time later.
- Click the Images tab and select the Upload Image button in the top-right corner.
- Enter a URL for the image or Upload a File, then hit Save.
- Acceptable image formats are JPG, PNG, and GIFs.
You can upload up to 12 images, but each marketplace has limitations. You can contact the sales channel directly to check their image guidelines.
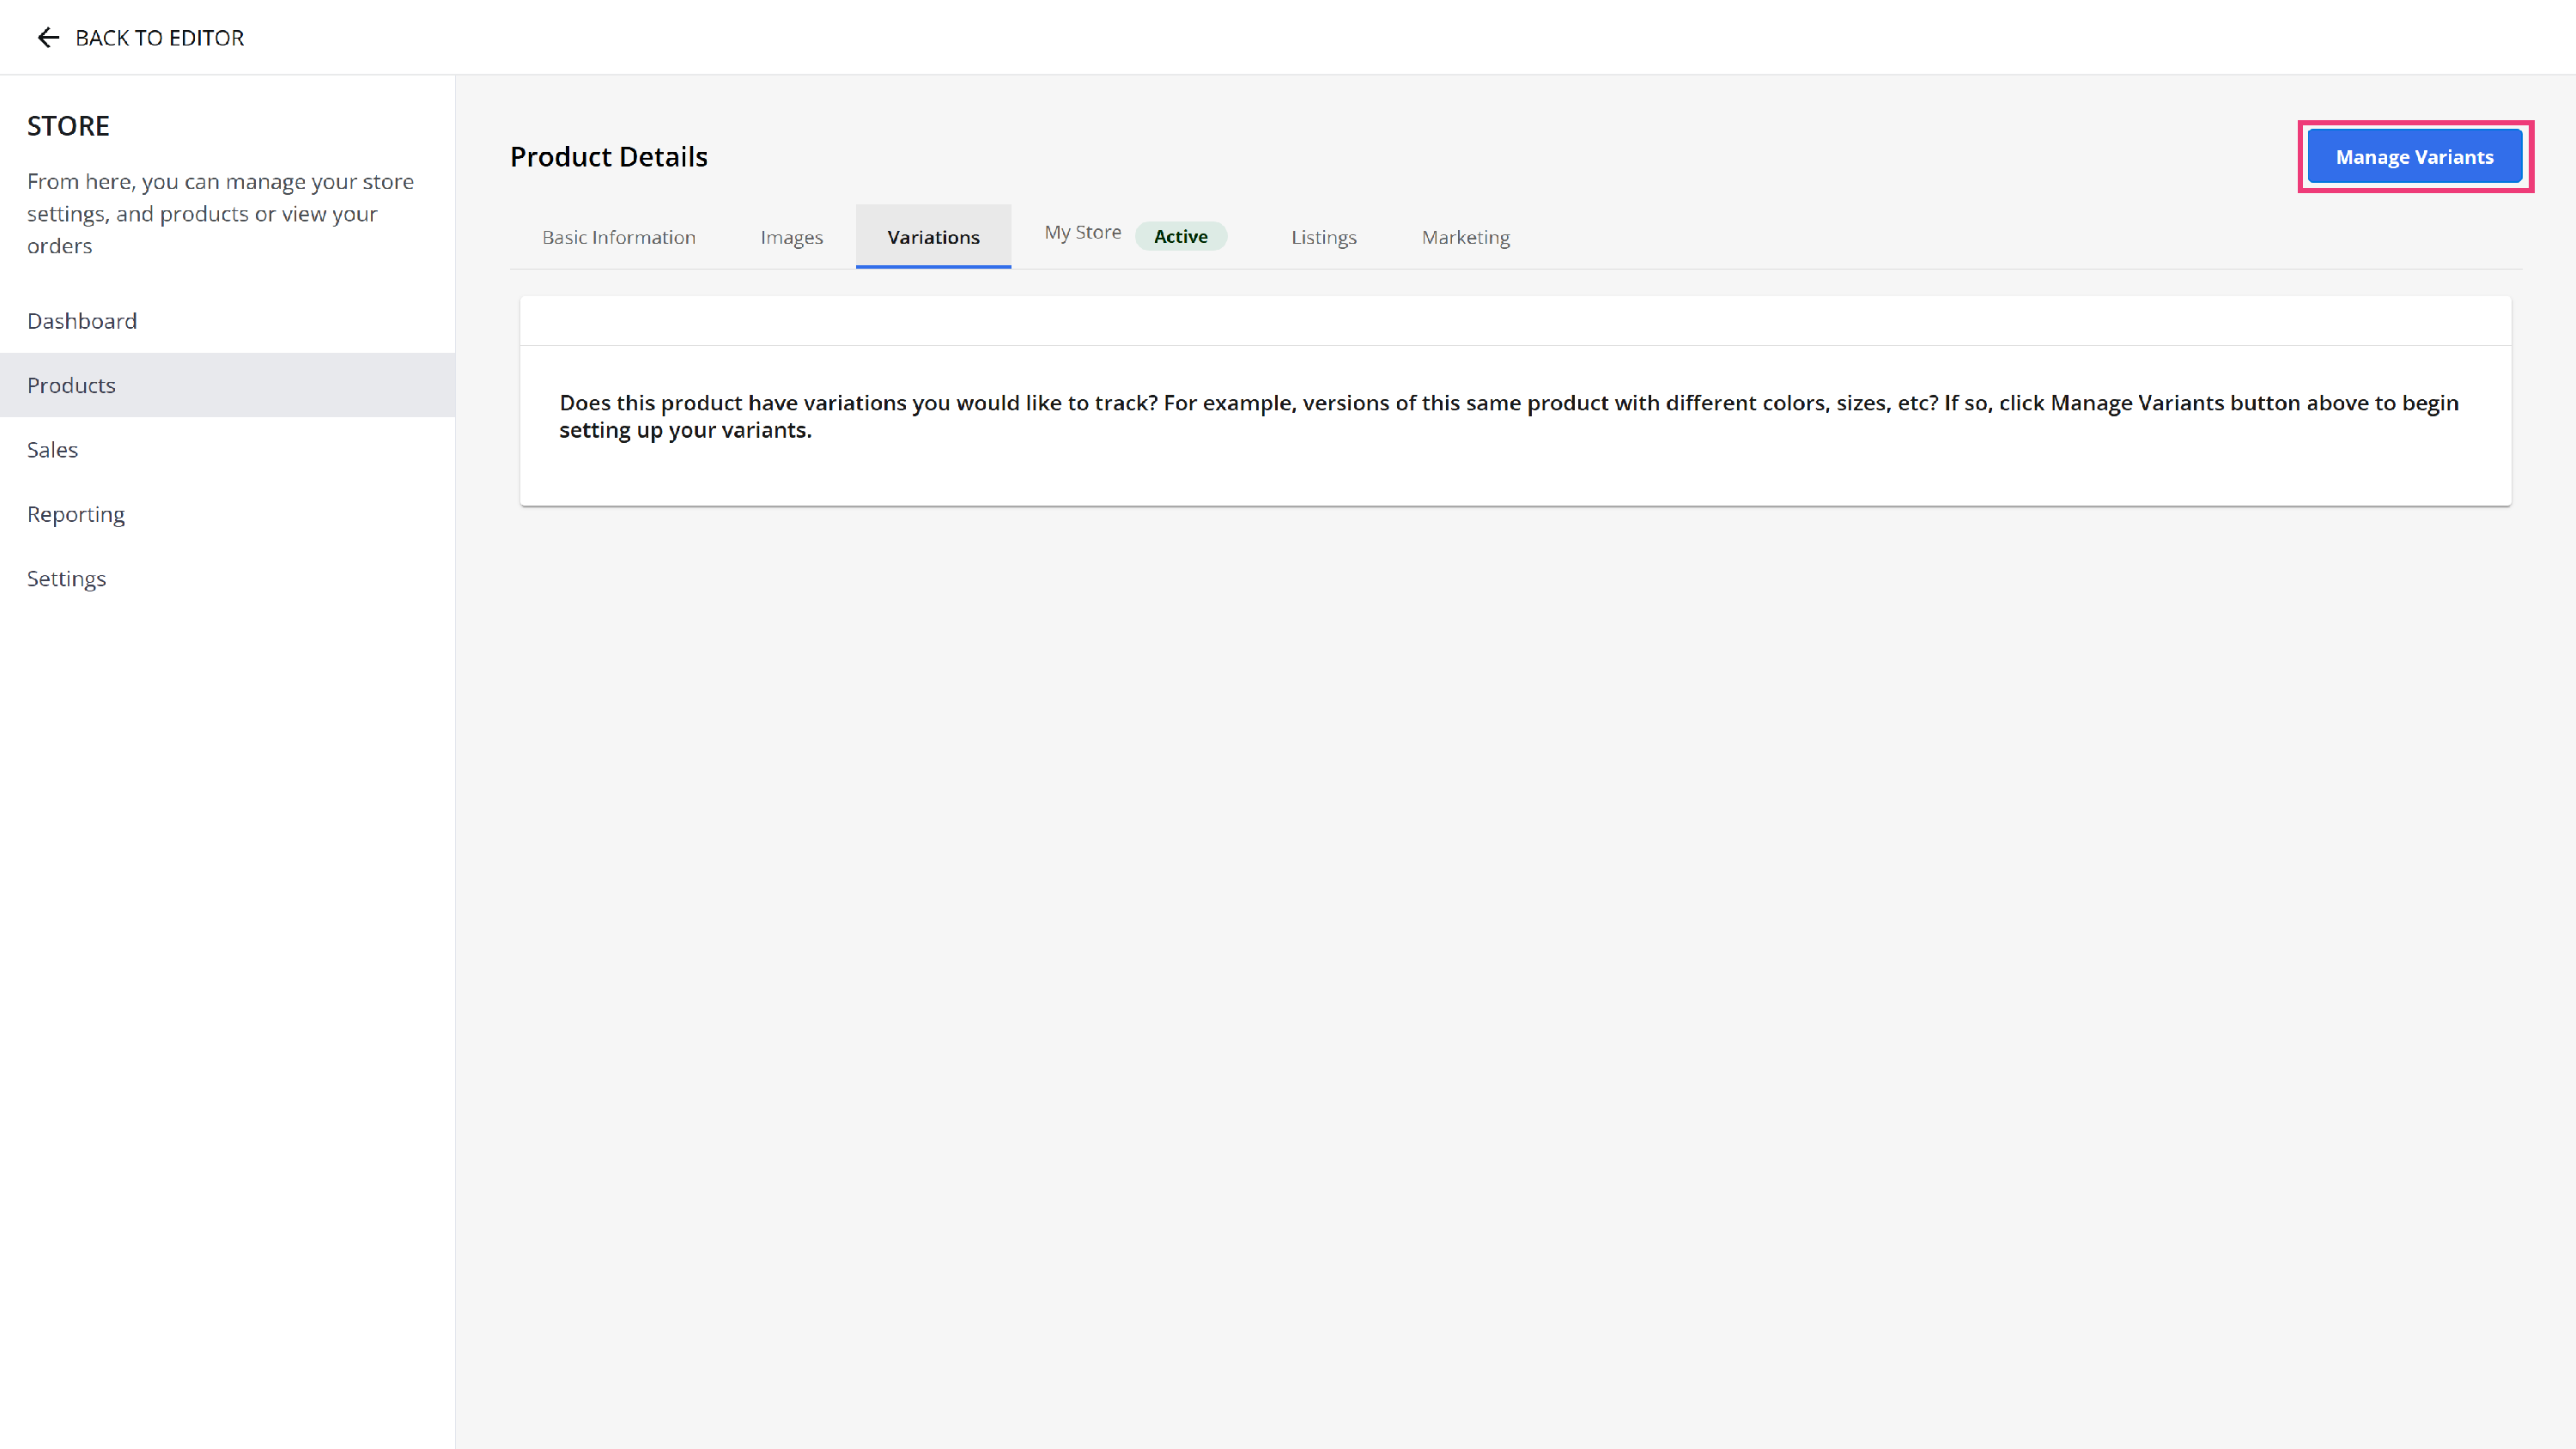
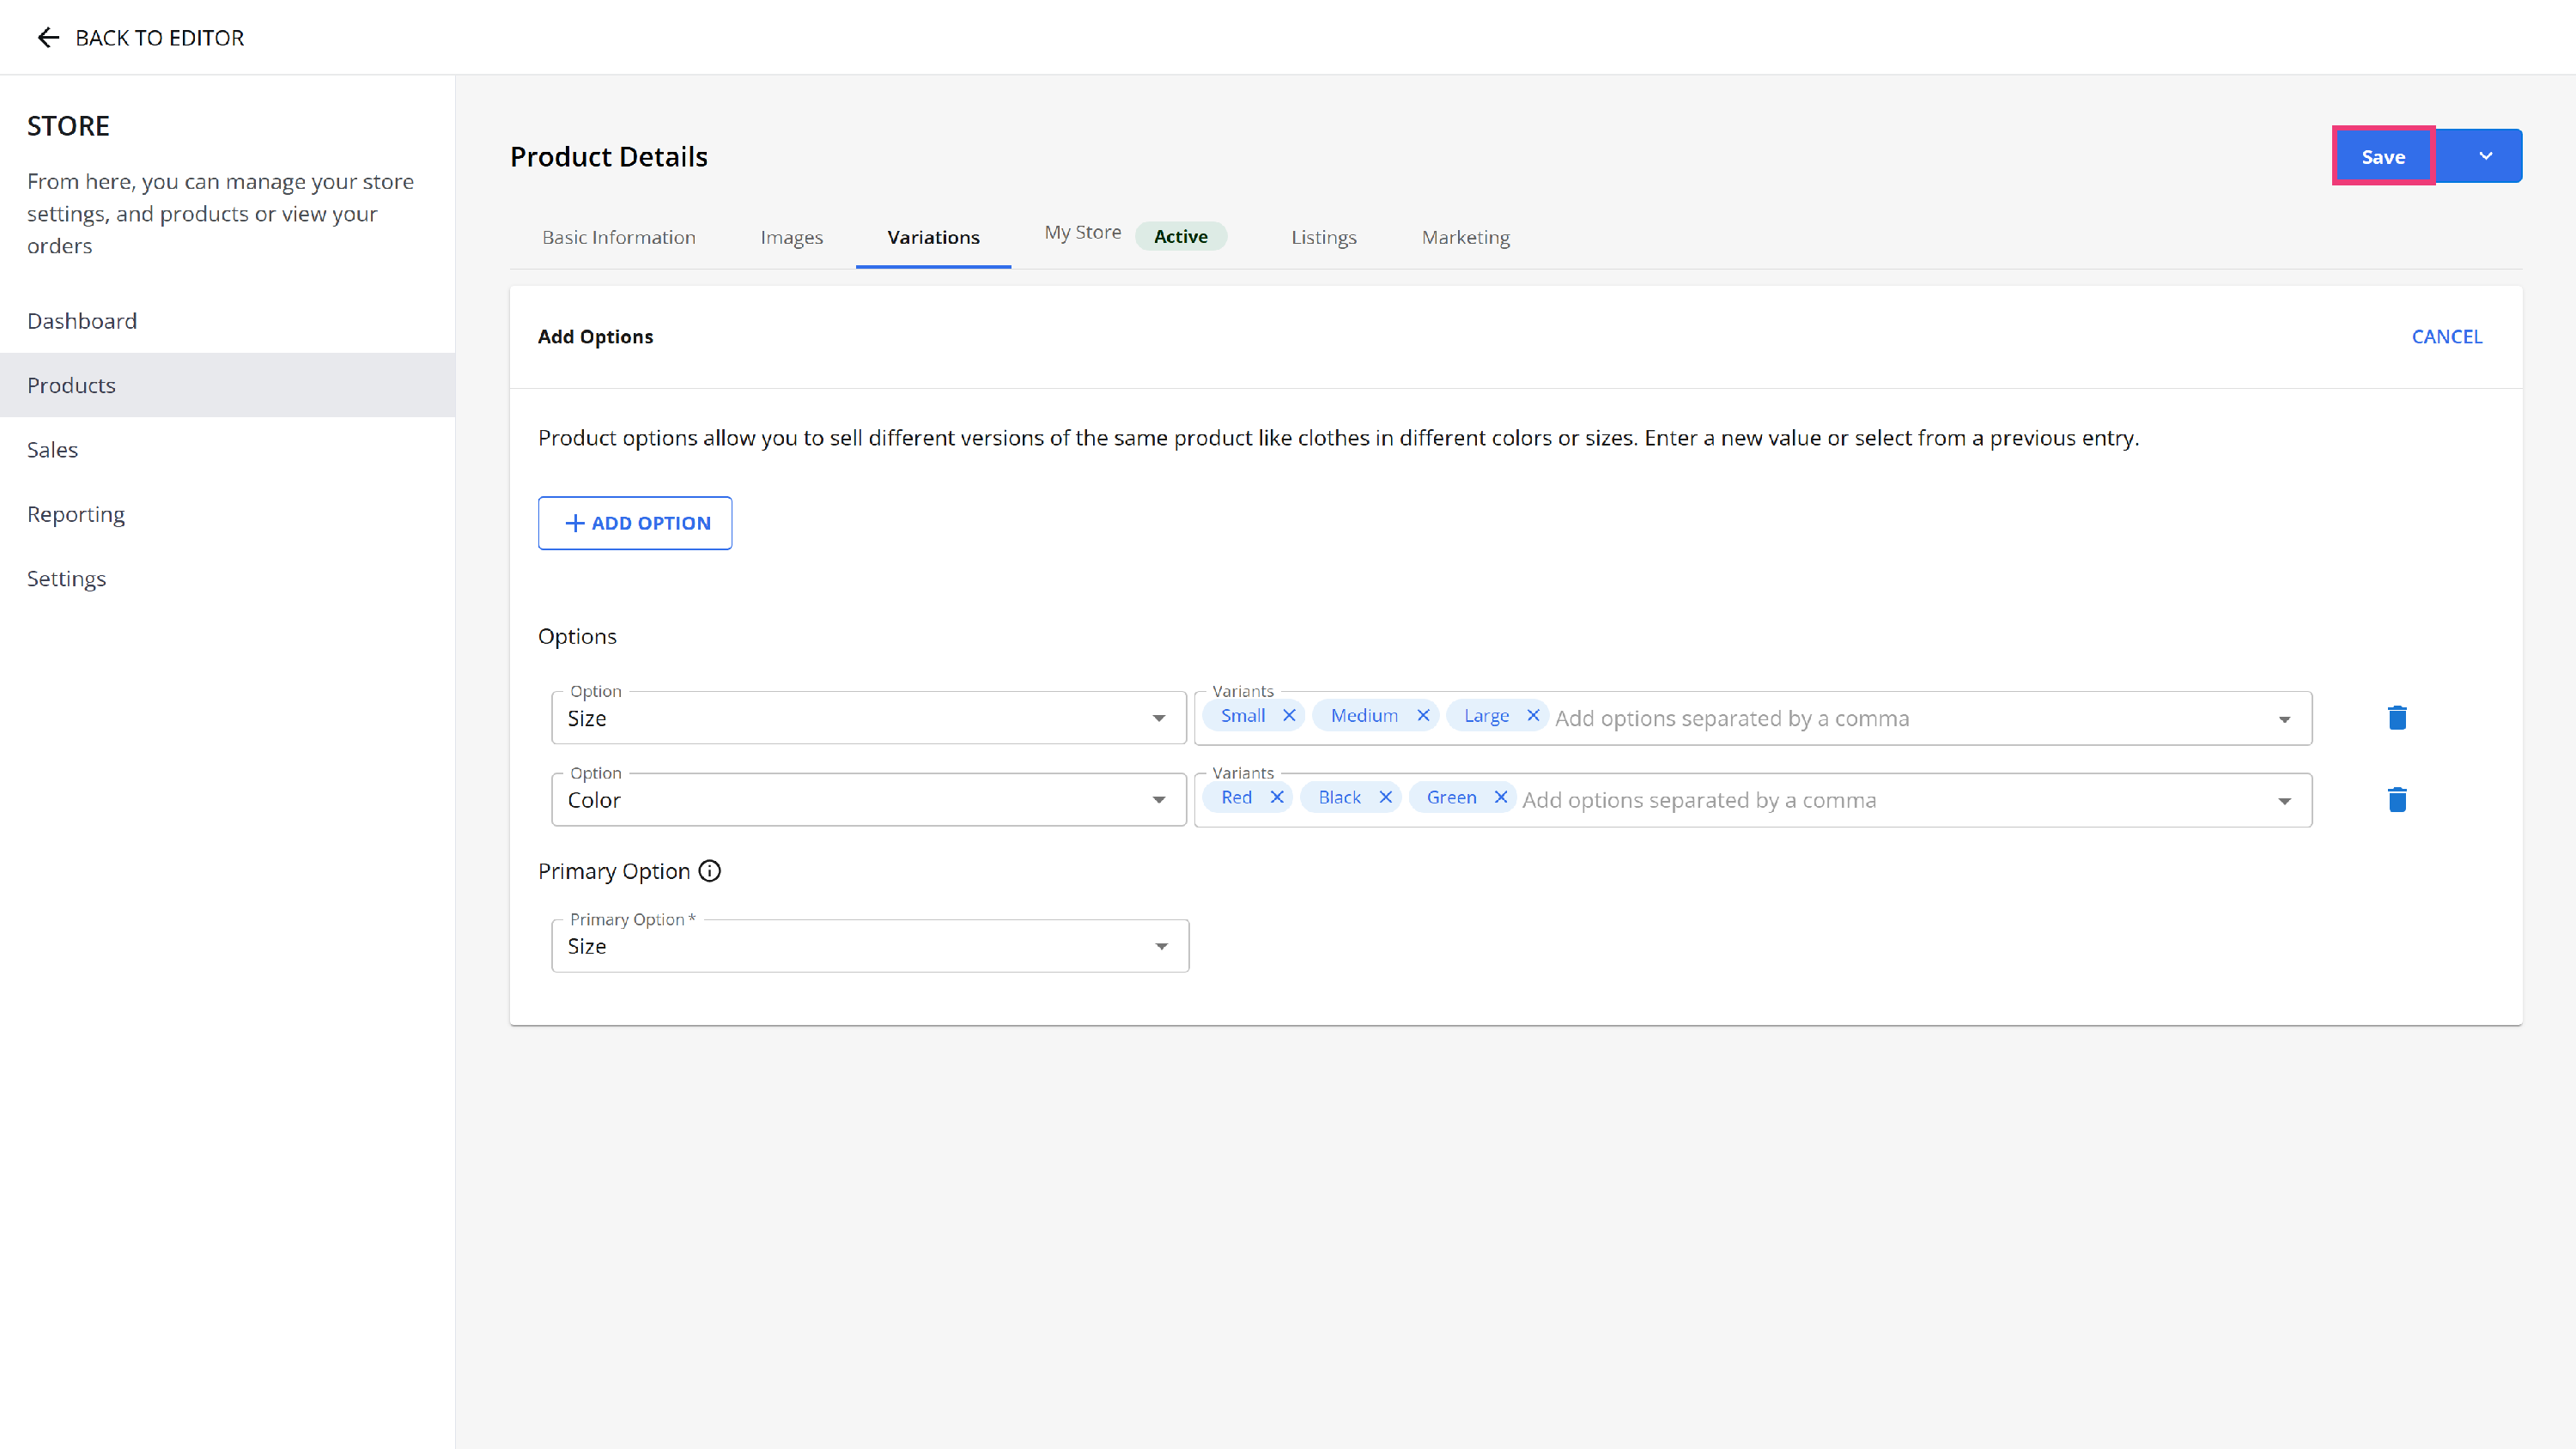
Variations Tab
Manage the product variations, including images and pricing, in this tab.
- Click the Variations tab.
- If you don’t have any variants added, click the Manage Variants button.
- Click the +Add Option button.
- Enter the variation type in the Option field (you can add up to 10 options). Examples of options include Color, Material, Finish, Storage, Style, Length, Stain, Table Size, Size, etc.
Please Note: Some marketplaces may have specific limitations that restrict the number of options/variants that can be displayed.
- Add each variant of the option in the Variants field, separated by a comma. For example, to add the colors red and green, type “Red,” then type “Green,”.
- In the Primary Option section, choose the option you want to be the primary variation option, then click Save.
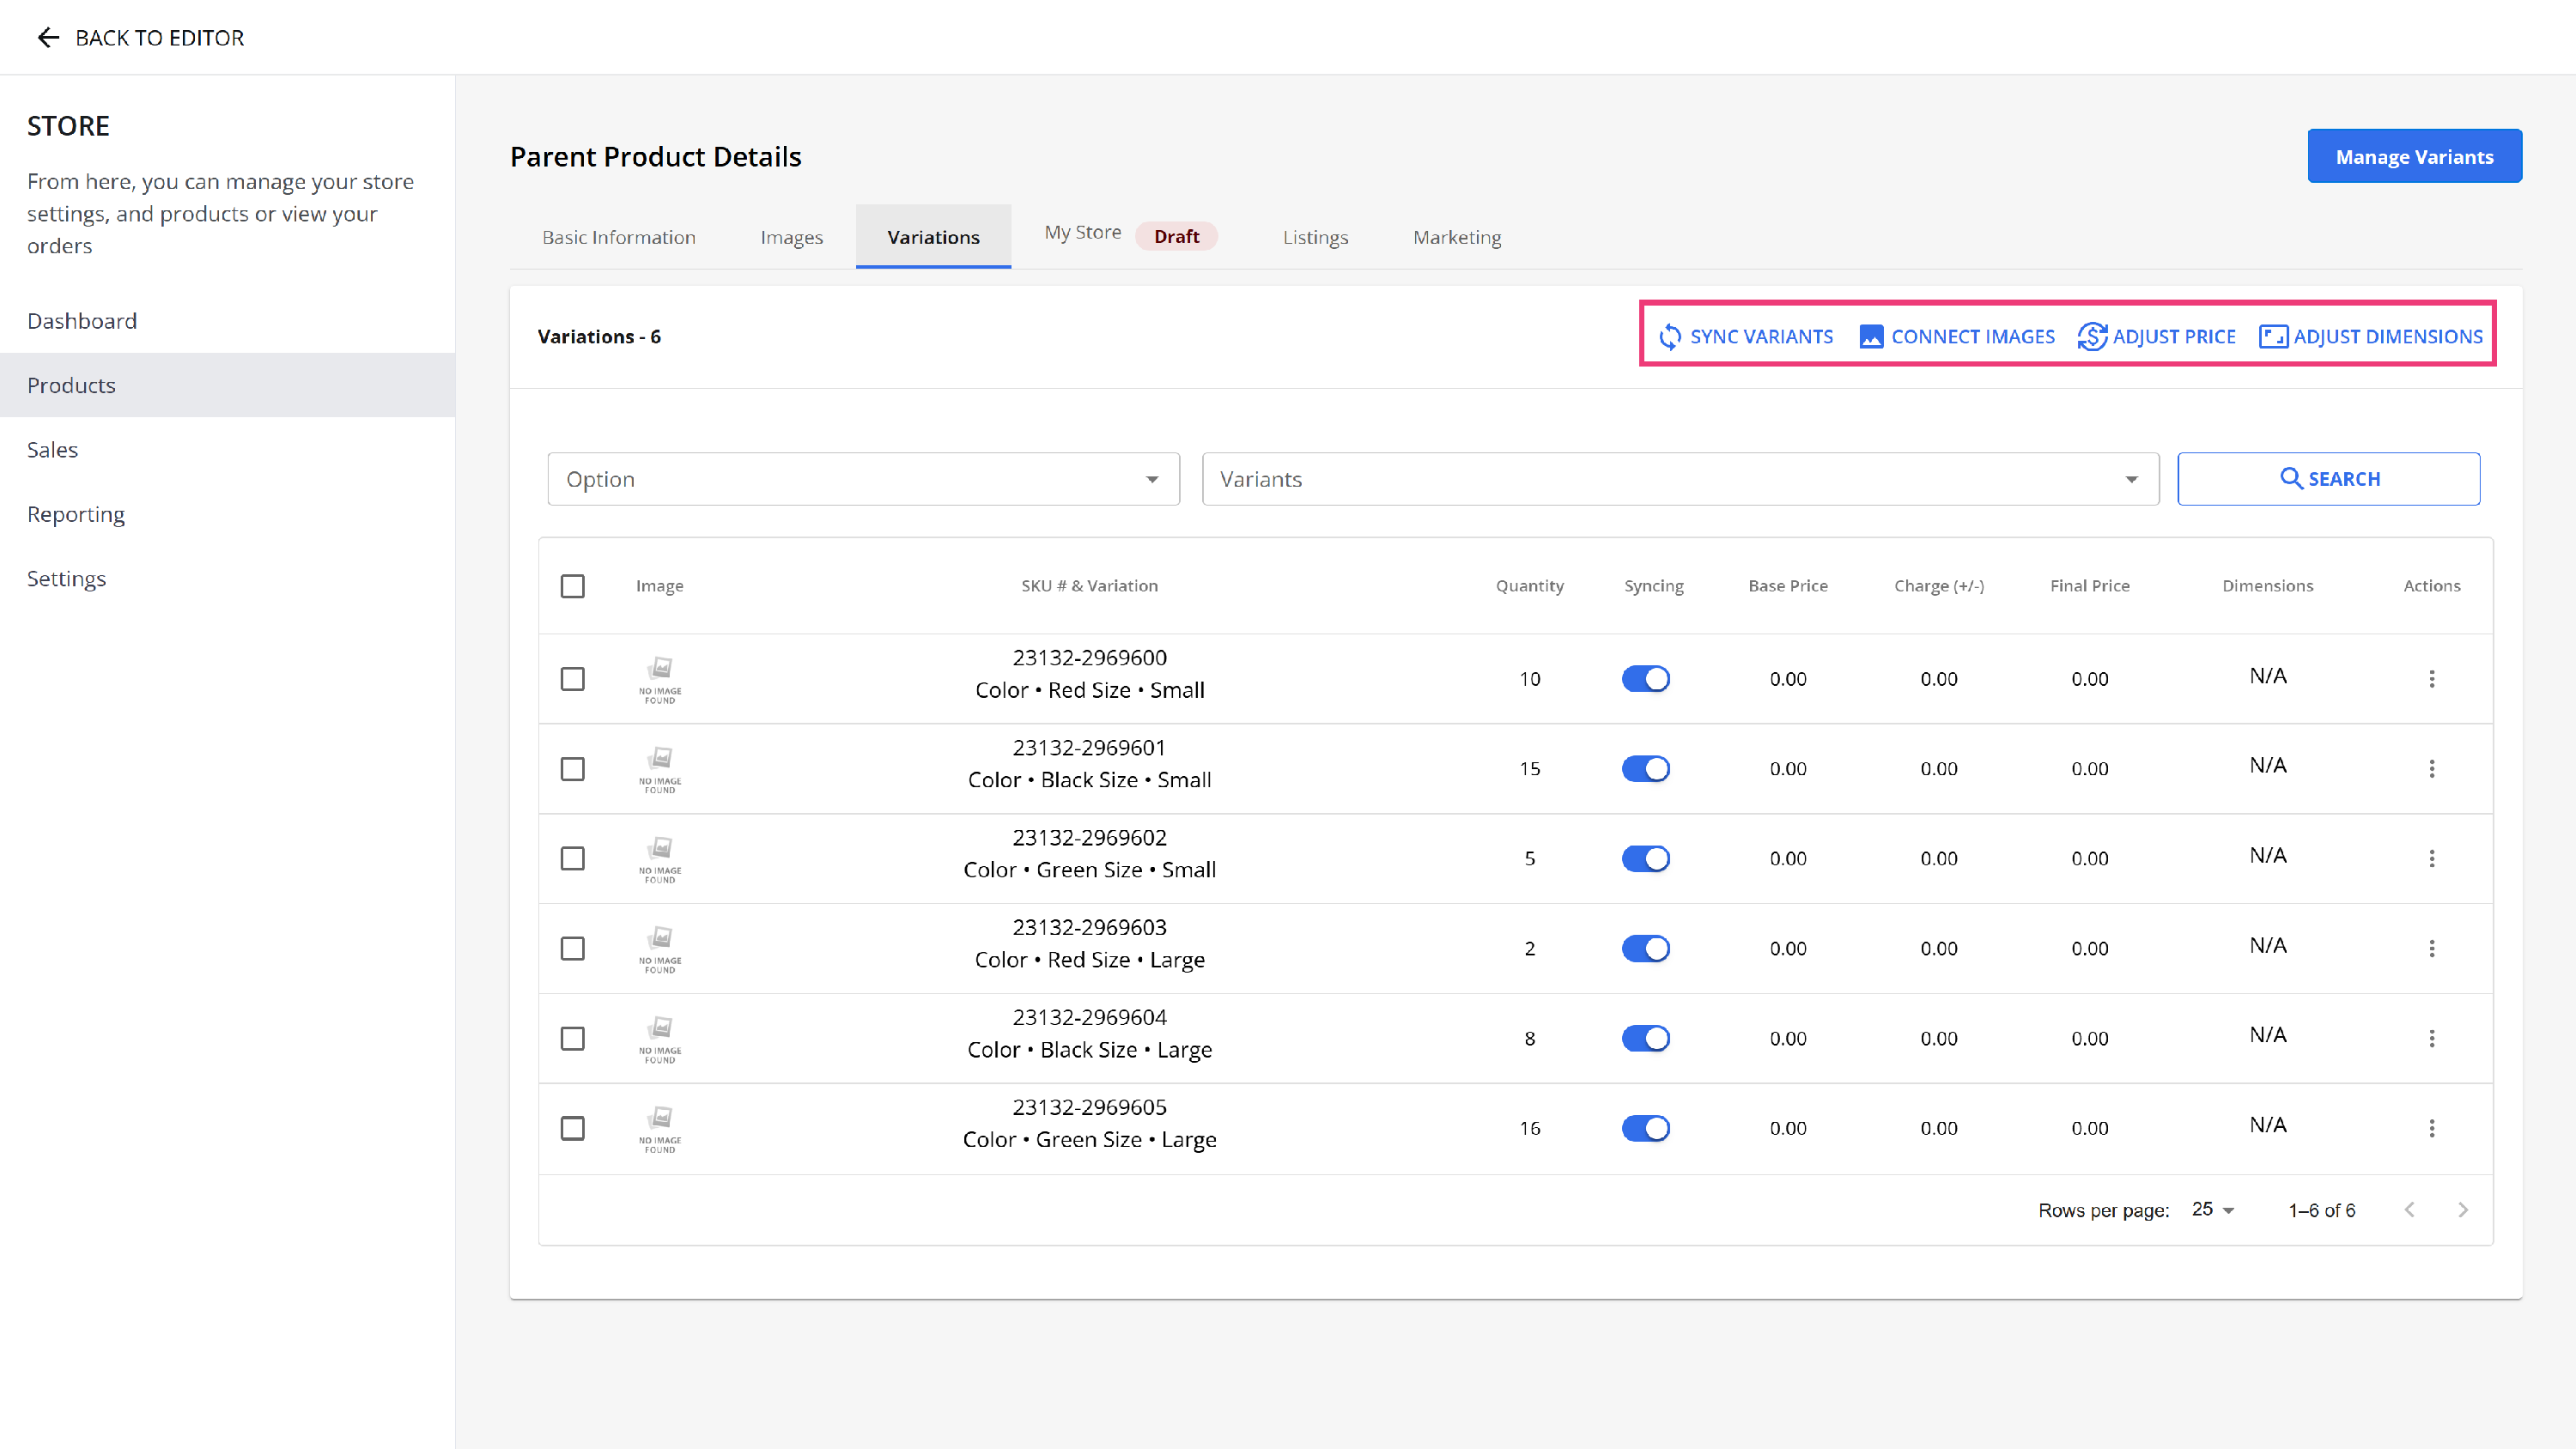
- You will see all the variations for your product individually.
- After selecting one or more products, you can take the following actions:
- Sync All Your Listings – If auto sync is enabled, clicking Sync Variants will automatically submit the changes to your listings.
- Add Images in Bulk – Click Connect Images, then enter a URL or upload the photo file, and click Save.
- Adjust the Price of the Variations in Bulk – Click Adjust Price. You will see the base price you set earlier. You can add either a percent or an amount as an additional charge for your variation, and the Final Price field will automatically update. Click Save when you are done.
-
Change the Dimensions – Click Adjust Dimensions, enter the new dimensions, and click Save.

My Store (Draft) Tab
- Product Card – Add information like Listing Title, Short Description, and Quantity. Edit or update the SKU Number, turn on the Unlimited Quantity toggle option, and Manage Images.
- Description – Provide a full description of the item. Add paragraphs, quotes, lists, and tables as needed.
- Meta Details – Add the Meta Title, Meta Keywords, Image Tags, and Meta Description that help increase the product page rankings.
- Category – Add the product to one of the existing categories from the dropdown. The chosen category will be visible in the field Category Path.
- Fulfillment Types – Select one option for your item:
- Shippable – Shipping price is required to be set,
- Non-Shippable
- Free Shipping
- Local Pickup – Add pickup preparation time and details to let your customers know that the product is ready for pickup after purchase.
- Shippable and Local Pickup – Choose this option if your item can be shipped to the customer’s preferred location or have them pick it up in the store/warehouse.
- Variations – Manage the Product Variations.
Marketing Tab
Choose from the list of available Sales Channels to manage your listing. Once you have selected an option, you can update the Listing Details.
Visit How to Connect Your eCommerce Store to Marketplaces for help adding a sales channel.
Review
Understanding how to create parent products within your eCommerce platform effectively is essential for boosting your product listings and enhancing the overall shopping experience for your customers. Businesses can significantly improve their online visibility, streamline the shopping process, and ultimately drive more sales by focusing on the strategic integration of eCommerce product listings. Remember, the key to success in the digital marketplace lies in how well you present and organize your products. Therefore, investing time in creating well-structured parent products is not just about product management; it's about setting the foundation for a thriving eCommerce business.