.png)
Connect and Manage a Zoom Account in eCommerce
Connecting your Zoom account in eCommerce allows you to simplify the process of scheduling and managing Zoom meetings directly within My Schedule. This eliminates the need to switch between platforms and simplifies your workflow.
Table of Contents
- How to Connect a Zoom Account
- How to Create a Zoom Meeting
- How to Access Zoom Meeting Links
- How to Disconnect Your Zoom Account
- Review
How to Connect a Zoom Account
- In your Account Manager, click Websites on the left side of the page:
- If you only have one Website plan or eCommerce package, you will be automatically redirected to your Website Builder.
- If you have multiple packages, click Launch next to the Website or eCommerce product you want to manage.
-
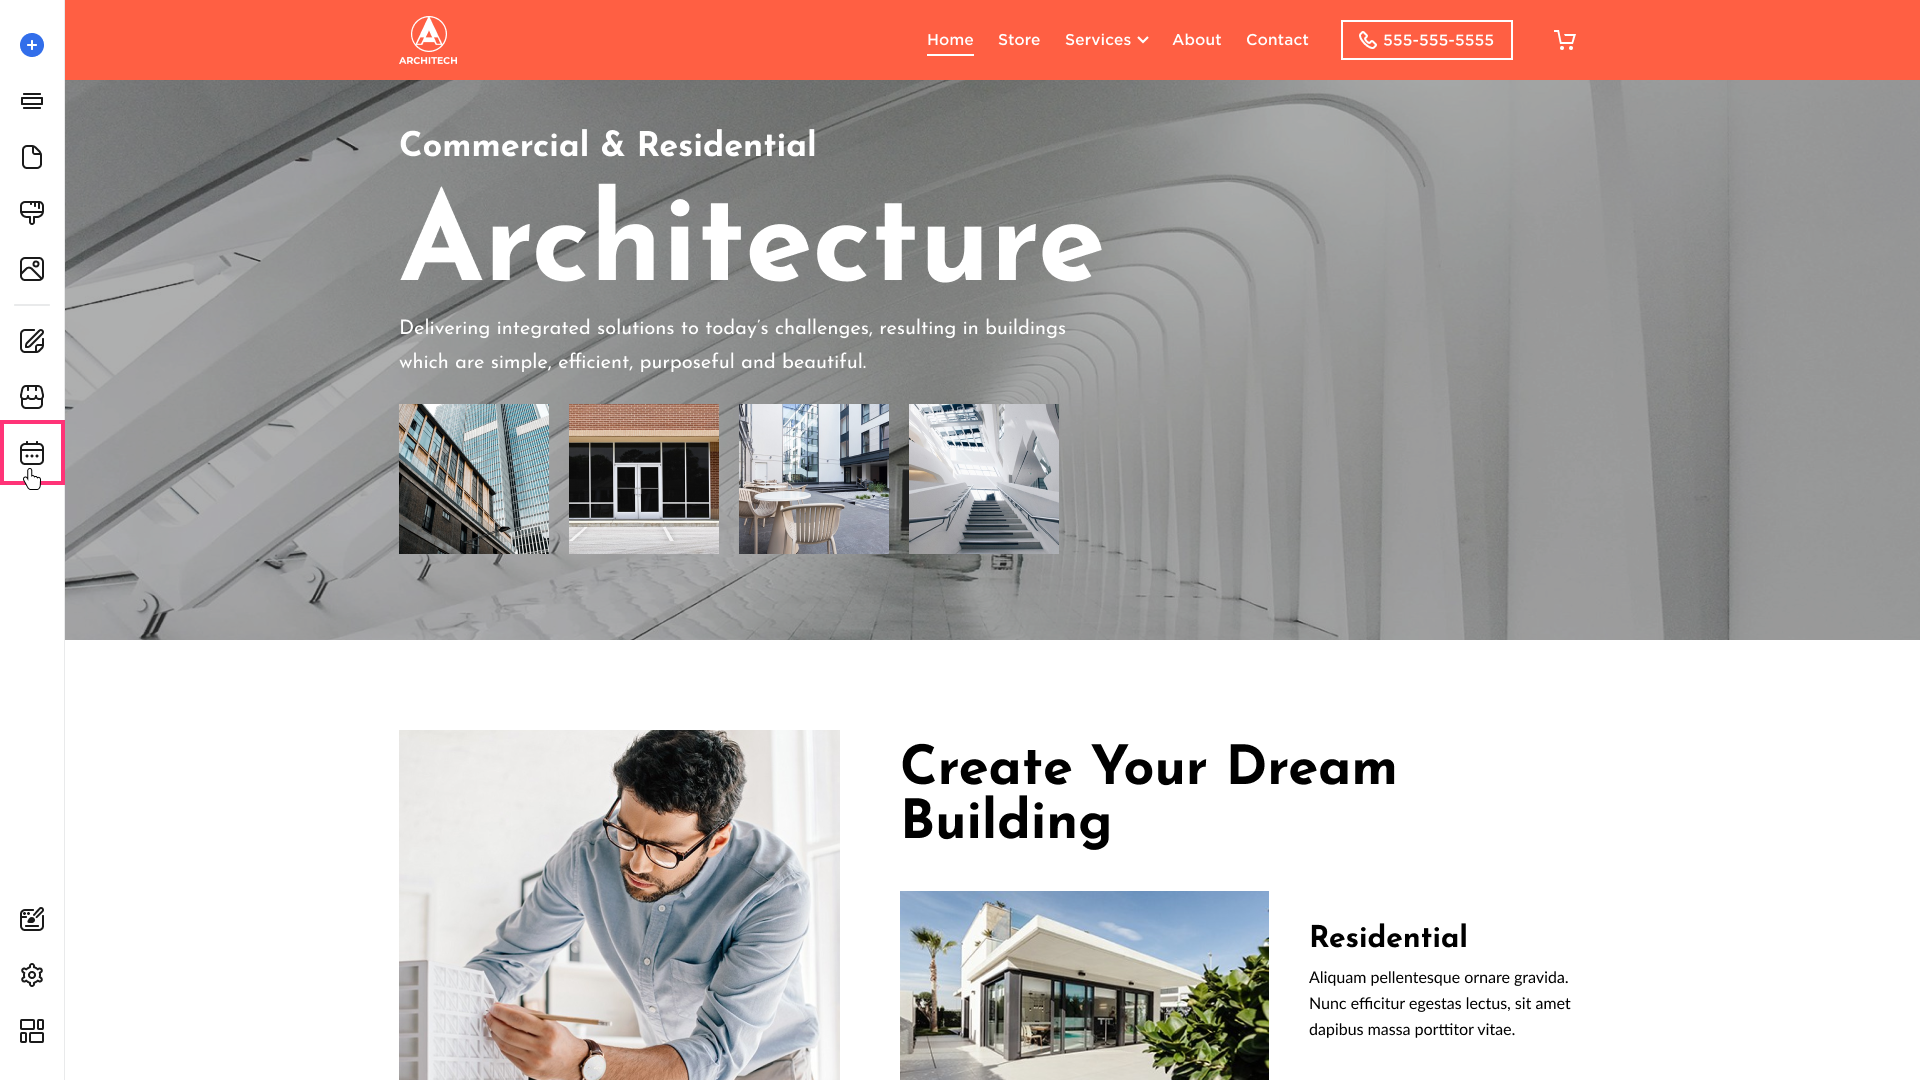
Once inside your Website Builder, click the Appointments icon on the left menu.

- In the Settings section, scroll down to the bottom part and find the Zoom Settings card. Then, click on the Connect to Zoom button:

- Click the Connect to Zoom button again within the Zoom Settings page:

- In the Add Zoom Account pop-up, click on Continue. This will redirect you to the Zoom login page. Use your Zoom User ID and Password to log in:

- Once you have entered your Zoom credentials, you will receive a message as seen below. Tick the checkbox to enable the Allow this app to use my shared access permissions option. After reviewing the details, click on the Allow button to proceed:

- You will then receive a confirmation that your Zoom account has been successfully connected.
- Click on the Go to Settings button to display the status of your Zoom Account and the restrictions associated with the account:

- Your Zoom account should be showing as Active and ready to be used:

How to Create a Zoom Meeting
To create a Zoom meeting for your appointments, please see “How to Schedule an Appointment” within the Managing Scheduling in MySchedulr article.
How to Access Zoom Meeting Links
- Go to Appointments button and select My Schedule. Then, click on the recently created appointment. Doing so will open a pop-up message displaying the Zoom meeting links.
- You can start the meeting by clicking Open Zoom Meeting as Instructor link or share the link to meeting participants by clicking on the Copy Zoom Meeting Link.
How to Disconnect Your Zoom Account
-
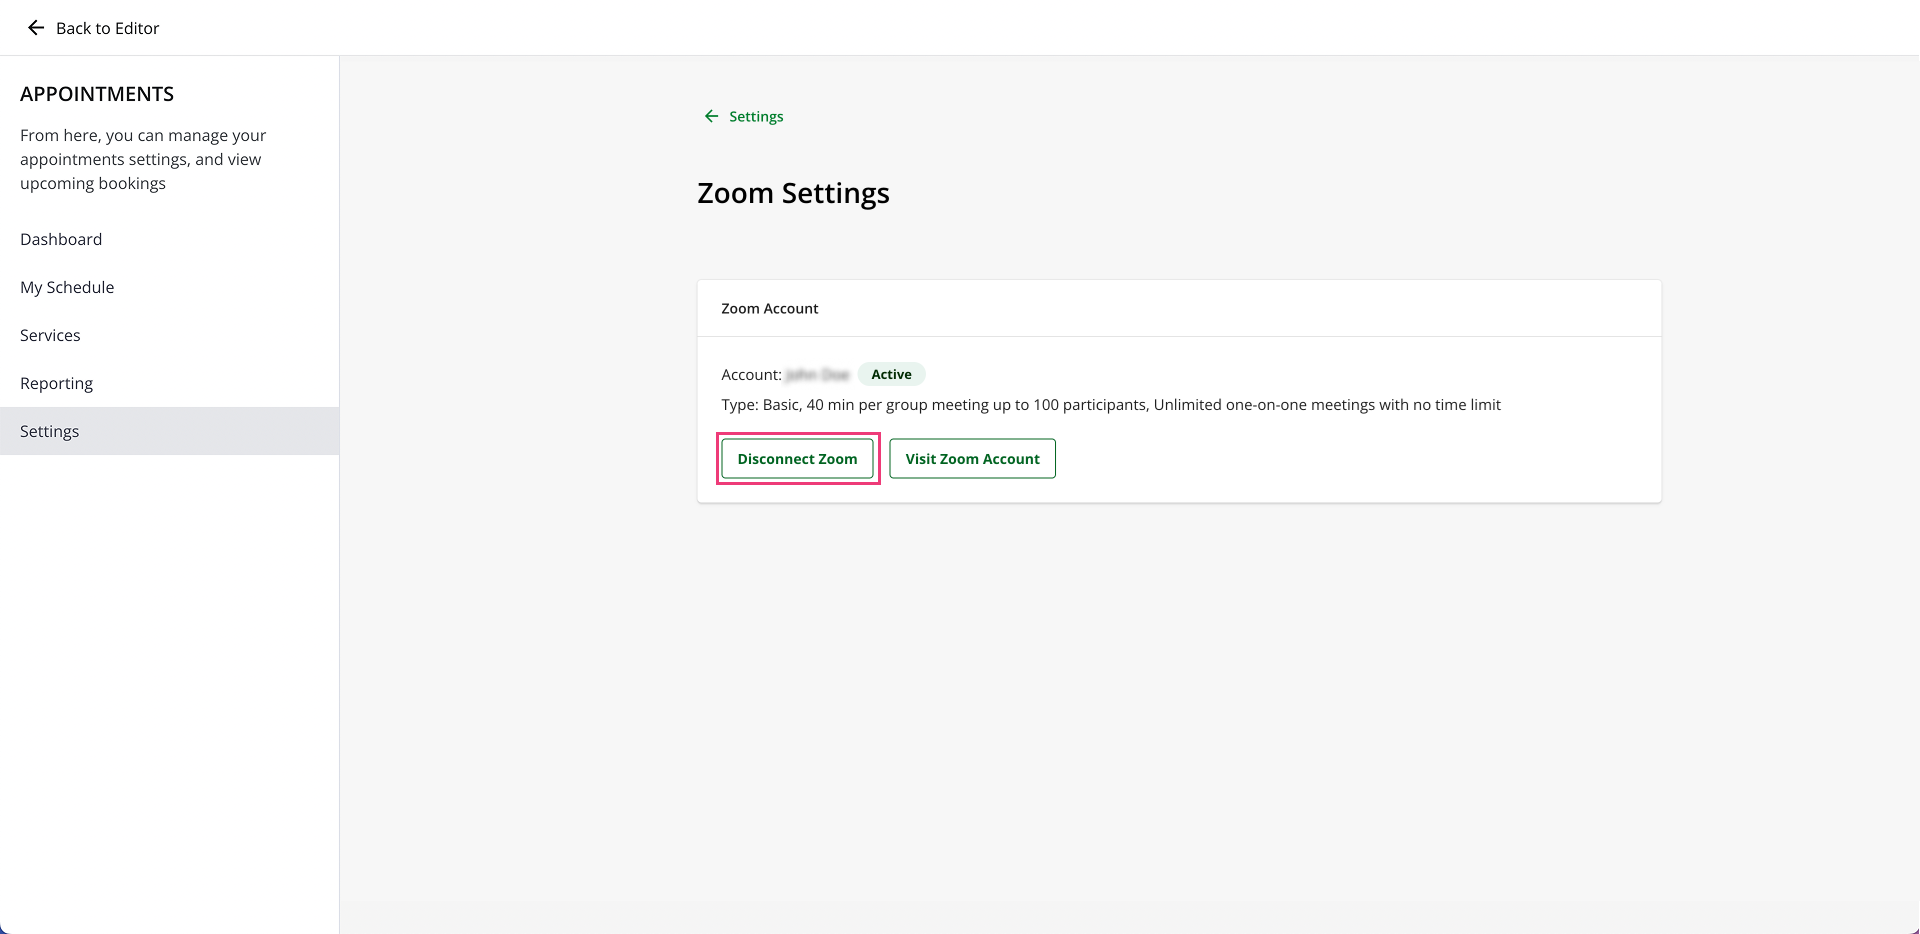
In the Zoom Settings page, click on the Disconnect Zoom button and a pop-up message will appear:
2. Click on the Yes button to proceed:


- You have successfully disconnected your Zoom account.
Review
By leveraging Zoom integration in Appointments, you can create, manage, and access Zoom meetings efficiently, all from a single platform. This will help you simplify your workflow and saves you valuable time.