.png)
Online Store – All About Product Subscriptions
Offering online store product subscriptions is a win-win for both you and your customers. Customers can enjoy the convenience of automatic deliveries, ensuring they never run out of their favorite products. This not only saves them valuable time but also translates into recurring revenue for your business. This article will guide you through setting up and managing product subscriptions in your online store. You can also head to our blog to learn how to set up and grow an eCommerce subscription business.
Table of contents
- What You Need to Know Before Enabling Subscriptions
- Adding a Subscription
- Managing Subscriptions
- Pausing or Deleting a Subscription
- Subscribing to a Product on Your Website
What You Need to Know Before Enabling Subscriptions
Determine Your Products and Billing
Establish which products you want subscription plans for and the options your customers have for how often to receive them. You will also need to determine pricing and billing terms.
Enable Stripe
Before adding subscriptions, you need to enable Stripe as a payment processor. Visit Adding a Payment Processor for instructions on setting up Stripe.
Publish Products
To create a subscription, you must publish the products to your live website first. This will allow your customers to purchase the product one time or as a subscription. You can visit the Adding a Product article if you need more information.
Adding a Subscription
The first step in getting subscriptions on your website is adding subscriptions to your products. Use the following steps to add a subscription.
- Log in to your account via https://www.networksolutions.com/my-account/login.
- On your Account Manager homepage, click Websites on the left menu. If you only have one eCommerce product, you will be automatically routed to your Website Builder.
- If you have multiple eCommerce products, click Lanch next to the product you would like to update.
- Click Store in the left navigation sidebar.

- Choose Products from the drop-down menu and proceed to the Subscriptions tab.

- Click the Create New Subscription button at the top right of the page.

- Fill out the following sections, then click Save.
- Plan Details – The name and description of the plan that will be visible to your customers.
- Delivery and Billing – Set up the frequency of the order and the shipping cost associated with it.
- You can set up to 5 different frequency options for your customers.
- The shipping cost must be a fixed amount. Real-time shipping is not available for subscriptions.
- Products – Select the listed product you would like to offer for the subscription. Products can only have one subscription.
- Discounts – Add a discount to incentivize your customers to sign up for a subscription.

Troubleshooting Issues Creating Subscriptions
- Check to be sure you are in Subscription Details, and you have the correct product selected.
- Double-check the order frequency, value, time to ship, and shipping charge.
- Make sure the product you selected doesn’t already have a subscription.
Managing Subscriptions
Once you have the subscriptions created, you will need to manage them.
Update Subscription Details
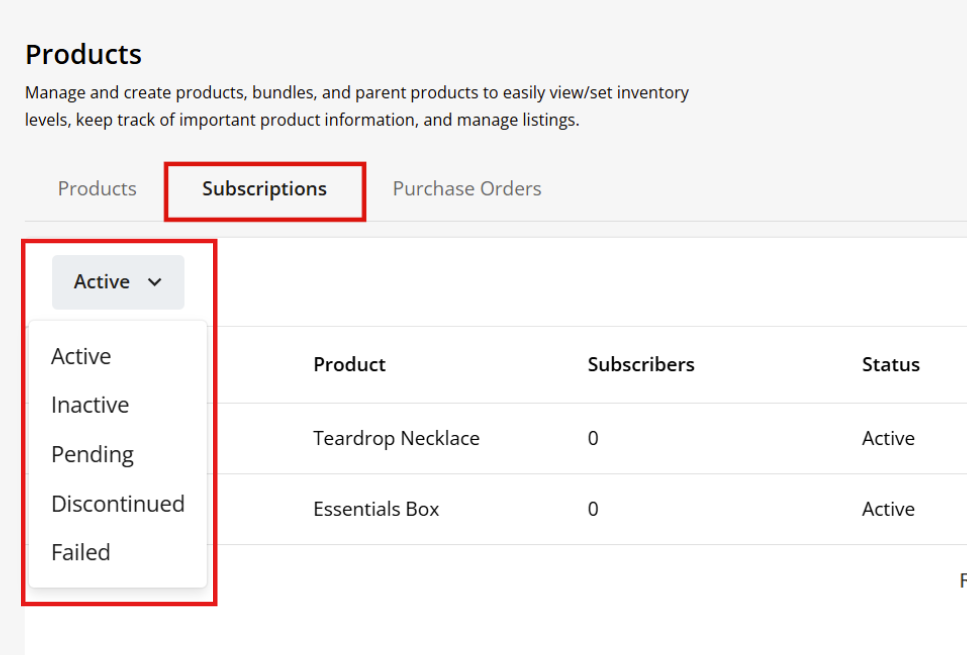
- Click the Subscriptions tab in the Products section.
- You will see five tabs.
- Active – Shows subscriptions that are currently active.
- Inactive – Shows subscriptions that you have paused (made inactive).
- Pending – Shows subscriptions that are still processing.
- Discontinued – Shows subscriptions that you have permanently discontinued.
- Failed – Shows subscriptions that did not go through.
- Locate the subscription you want to manage and click on it. You will see the Basic Information tab. After making your updates, click Save.

Manage Orders or Subscribers
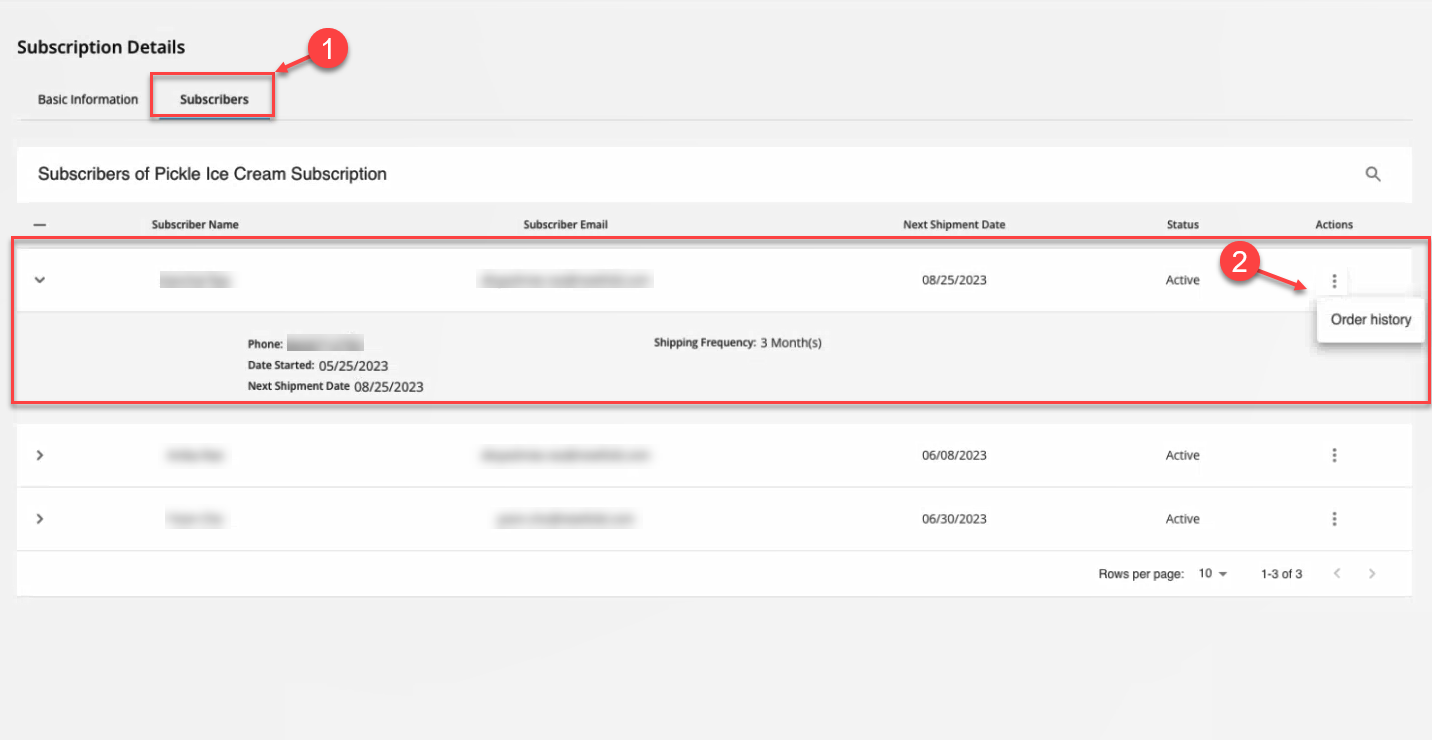
- Click the Subscribers tab.
- Click the vertical ellipsis next to the subscriber you want to manage and choose Order history, as seen in the image below.
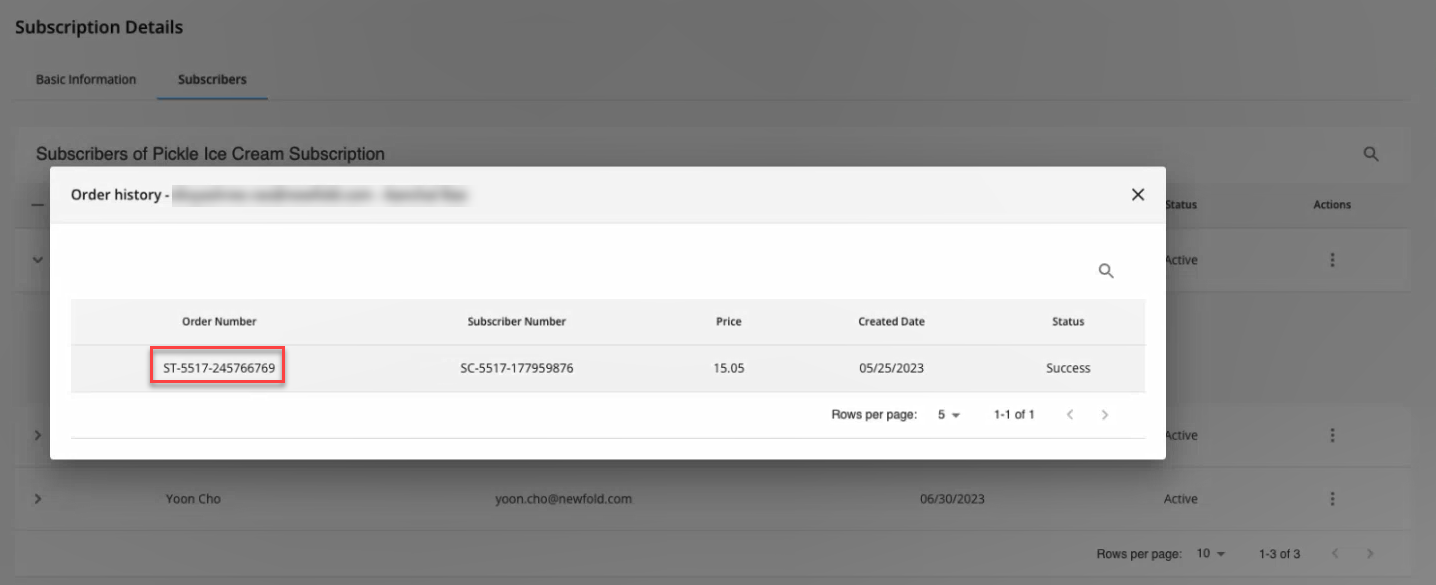
- You will see the Order Number, Subscriber Number, Price, Order Date, and Status here.
- The Subscriber Number is the number the customer receives when they order or manage their subscription. You can locate the order number needed by searching for the subscriber number.
- Click the Order Number to be taken to the order details page.
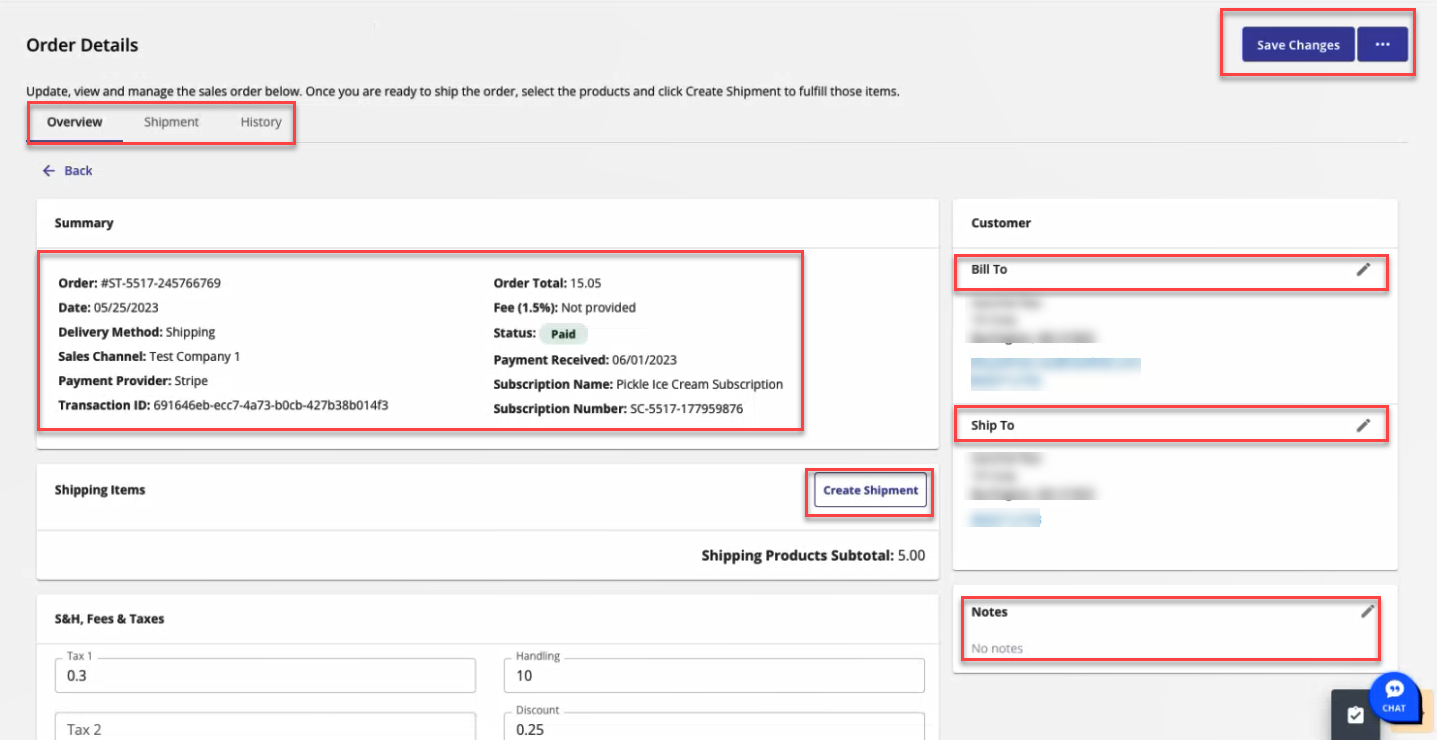
- On the Order Details page, you can view the order, create a shipment, view the fees, edit the customer’s information, and more. Click Save Changes when you’re done.
If you want to manage your orders further, click on Store in the left navigation menu. Click on Sales, then click on Orders.

You can manage paid, unpaid, closed, and abandoned orders from here.
Pausing or Deleting a Subscription
There may be times when you no longer need a subscription for your product. Follow the steps below to delete a subscription.
- Click on the Subscriptions tab.
- Click the vertical ellipsis ( ⋮ ) next to the subscription you want to delete and select Change Status.

- Choose Inactive to pause the subscription or Discontinue to permanently cancel the subscription, then click Accept.

Subscribing to a Product on Your Website
Look at the steps below to see what your customers will experience when subscribing to one of your products on your website. Please note that no additional purchases can be made when purchasing a subscription.
- Choose a product on the website and click the View Details button.

- Choose your frequency, then click the Subscribe button.

- The checkout page will appear.
- Fill out the fields with the shipping information, select the payment method, enter the payment information, and then click Place Order.

- They will be taken to a page confirming your order. You can view the order details here, including the subscriber number you can reference.

- The customer will also receive the order confirmation via email. It will contain the order information, subscriber number, and a link allowing them to sign up and manage their subscription.

- The store owner will receive a new subscription email with the same information.

Subscribers can manage the subscriptions they purchase by:
- Clicking the Modify your subscription button in their order confirmation email. The link will take them to Stripe’s website to manage their subscription. Any updates the customer makes will automatically update your account.
- Contacting you directly.
If a payment fails, the customer and store owner will get an email advising them of the failed payment. Customers can check the payment, which will take them to the exact invoice or modify their subscription.
If a subscription is canceled, the customer and store owner will each receive a confirmation email with the subscriber number and the canceled product.
Review
Product subscriptions can help you and your business as they provide convenient and automatic deliveries for favorite products while helping you generate revenue. Learn how to prepare, add, and manage your product subscriptions for your online store to enhance customer satisfaction and ensure ongoing revenue.