.png)
How to Add a Product to Your eCommerce Site
In this article, you will learn how to add a product or products to your eCommerce site using Website Builder to sell them online.
Please Note: This article describes how to create a product in the Ecommerce dashboard of the Website Builder. Please see the articles below on other ways to create products:
Table of Contents
How to Add a Product to Your eCommerce Site
- Log in to your account via https://www.networksolutions.com/my-account/login.
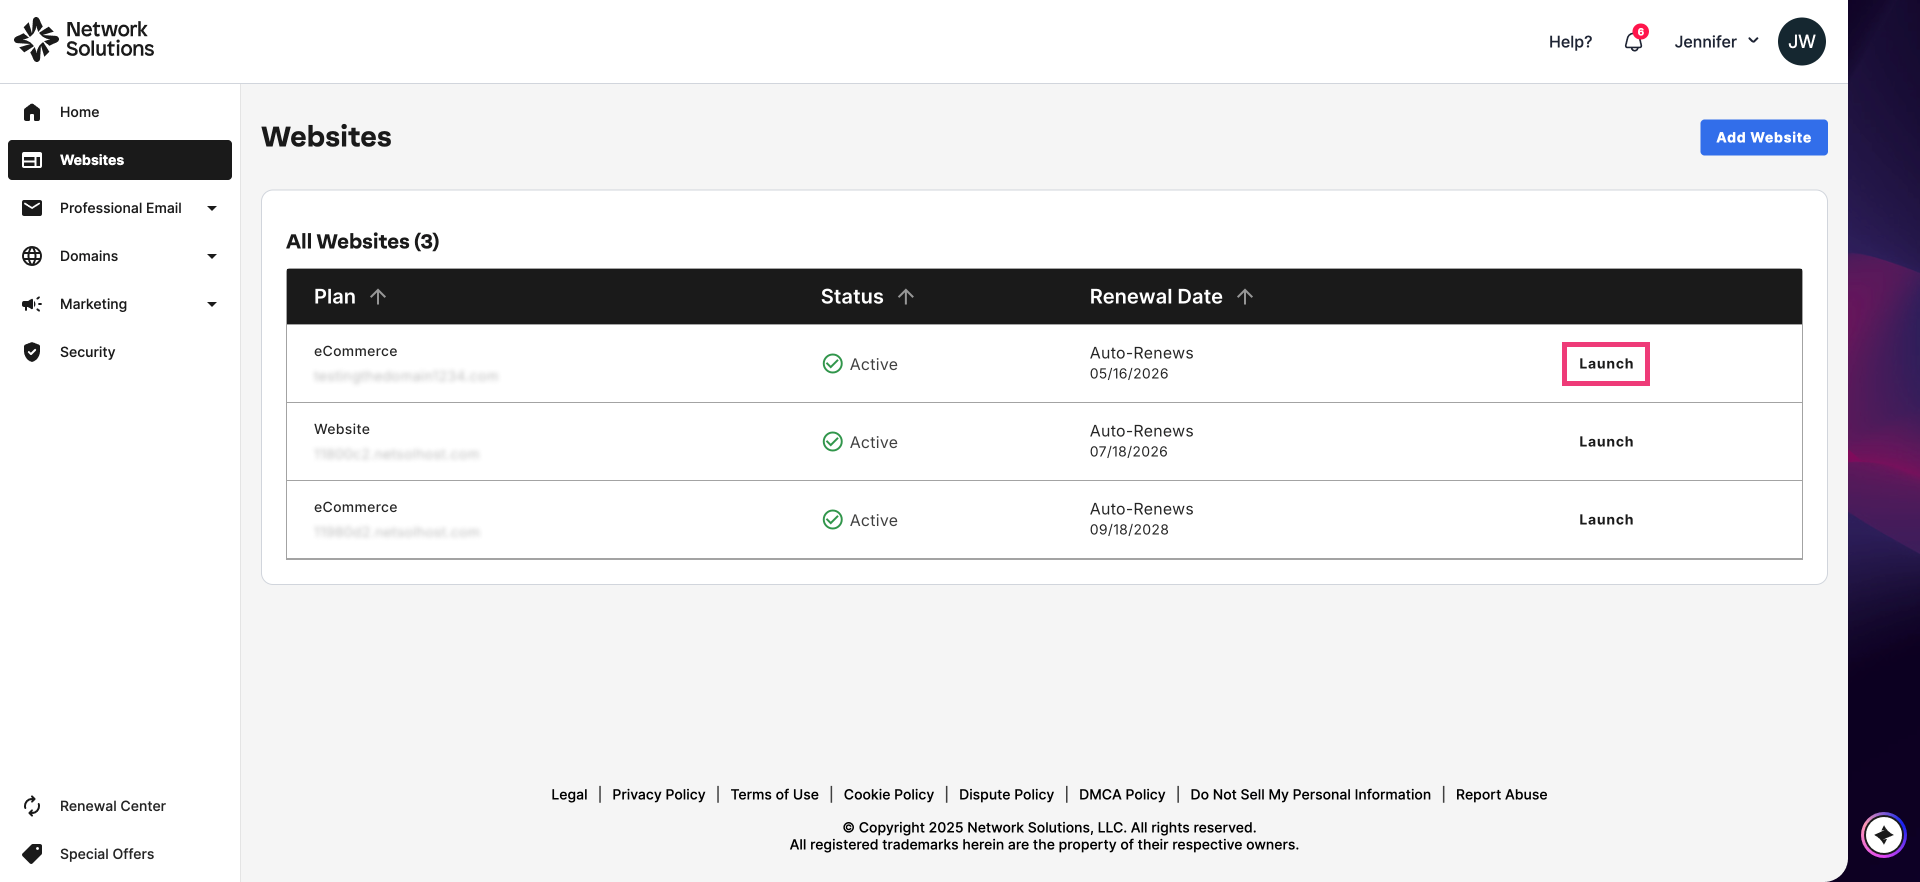
- On your Account Manager homepage, click Websites on the left menu.
- If you have multiple eCommerce products, click the Launch button next to the product you would like to update. If not, proceed to the next step below.
- Once inside your Site Editor, click Store on the left sidebar:

- In the Products section, click the Create Product drop-down on the top-right and select Product.

- Complete the following product information:
- Product Name - The name customers see on your store.
- Unique SKU - Add a unique SKU (Stock Keeping Unit) to identify this product.
- Price - Add a price for your product.
- Product Description - Describe your product.
- Category - Add a category to make it easier for buyers to find items on your site, allowing them to filter your complete list of products down to a specific category.
- Product photo - Add a photo of your product by clicking on Add Product Photos.

- Once you have completed the required information, you will have two options to add your product:
- Quick Add - This option automatically adds the product to your listings.
- Manage Product - Saves the product and opens the Product Details page for additional configuration (inventory, dimensions, supplier info, and more).

Please Note: You can also create a product using the Quick Create feature while working in the Site Editor, without opening the full Store section. Quick Create can be accessed via Product element settings. The Product element displays a single product card on a page. You can add it to any page except the Store page.
For more detail on adding or editing products through Quick Create, see Adding and Editing Products via Quick Create.
Please also refer to the Product Element article for more information.
Basic Information Tab
- In the first section of the Basic Information tab:
- Edit or change your Product Name.
- Update or add an image of your product if you haven't added one.
- Turn on the Auto Sync toggle (automatically updates integrated sales channels any time the product quantity changes).
- Specify if your product contains Hazardous material by clicking the drop-down arrow and choosing from the options.
- Configure the Reorder Level (the level of inventory that will trigger the product stock replenishment alert).

- Enter the Listing Title, Price, and Condition.
- Enter the product’s Short Description and Long Description. Adding product descriptions for your eCommerce store allows customers to make informed purchasing decisions.
Please Note: These details will auto-fill for any new listing you create for this product. Select Apply to All Listings if you would like these added changes to overwrite all existing listings for this product.

- Enter the product Dimensions, such as Length, Width, Depth, Major Weight, and Minor Weight.
- Set up the warehouse Aisle and Bin details.
- Specify the product Quantity of a specific Warehouse.
- Select Manage Warehouse to edit or add a new Warehouse.

- Choose a Supplier among the existing ones, or click Manage Suppliers to create a new one.
- Add a Supplier SKU to identify the Supplier.
- Enter the Target Inventory Level (the quantity you prefer to have at all times for a specific product).
- Enter a Unit Cost, Average Cost, or Landed Cost.
- You have the option to Order by Case. Enter the Case Cost, Case Quantity, and Case Rounding Type (price rounding). These details will auto-fill for any new listing you create for this product.

Under Identifiers, add the following:
- UPC (Universal Product Code)
- GTIN (Global Trade Item)
- ISBN (International Standard Book Number)
- EAN (European Article Number) identifiers for a product.
These identifiers can help marketplaces and search engines identify your product and show it in search results.
Under Manufacturing, add the following:
- Brand
- Manufacturer
- Manufacturer Part #
- MAP (Minimum Advertised Price)
These details are required when selling in specific marketplaces.
After applying all changes, click Save at the top right. By clicking the horizontal ellipses (⋯), you can convert the product to parent, convert to kit, or clone the product.
Review
Efficiently add products to your eCommerce store. Access your eCommerce dashboard and then go to your Store to add a product. When creating a new product, you must fill in essential details such as product name, SKU, price, description, category, and photos. Update your product's basic information and other necessary information, such as your global listing details, product dimensions, warehouse specifics, supplier information, etc.
Common Questions
How do I create a product for my store?
Open your ecommerce site, go to Store → Products, click Create Product → Product, fill in the details, and click Quick Add or Manage Product. Then make sure your Store page is visible in navigation (or add a Product element to a page).
I created a product but it does not appear on my website. Why?
Check the following things:
- Visibility: Is your Store page in the navigation, or did you add a Product element and select the product?
- Listing status: Is the product listing active (not draft)?
What is Quick Create and how do I access it?
Quick Create is a streamlined product form in the Site Editor. You access it through the Product element: add the element to a page, click Edit, open the Product Picker modal window, and click Add a New Product.
Do I need to publish after adding a product?
No, if you add a product in the Store section. The Store page updates dynamically — once a product has an active listing, it appears on the live Store page without republishing.
Yes, if you change your site layout in the Site Editor, for example, by adding a Product element to a custom page and creating a new product via Quick Create.
What is the difference between Quick Add and Manage Product?
- Quick Add: saves the product and activates the listing immediately. Best when you want the product live quickly.
- Manage Product: saves the product and opens the full Product Details page for inventory, supplier, dimensions, and other advanced settings.