.png)
DIY Website Builder— Troubleshooting Tips for Domain Issues
Facing domain issues while using our DIY Website Builder can be a daunting experience, but our troubleshooting tips for domain issues are here to assist you. Whether you’re struggling with DNS configurations, domain registration hiccups, or connectivity problems, this comprehensive guide offers practical solutions to help you resolve these common challenges.
When you purchased the DIY Website Builder package, you had the option to use an existing domain name or obtain a new one with the website builder. You will need to check if you purchased a new domain when you bought the website builder or if you chose to use an existing one with a current registrar.
In this article, we will discuss:
- Domain Purchased with Network Solutions
- Existing Domain Name
- How to View and Manage DNS Records for Existing Third-Party Domains
- Review
Domain Purchased with Network Solutions
If the domain you purchased is with Network Solutions, then this will likely require additional support. You can reach out to our support team via chat on Network Solutions or you can use our self-help option by going to our help page.
Existing Domain Name
- The builder did attempt to publish the site, but you will need to update the DNS with the Registrar/Company where it was originally purchased.
- Where did you purchase your domain from?
- If you purchased the domain from Network Solutions: see How Do I Manage DNS and Advanced DNS Records?
- If you purchased the domain elsewhere (i.e., GoDaddy, Domain.com LLC, etc.), you will need to contact the domain provider to update your DNS.
-
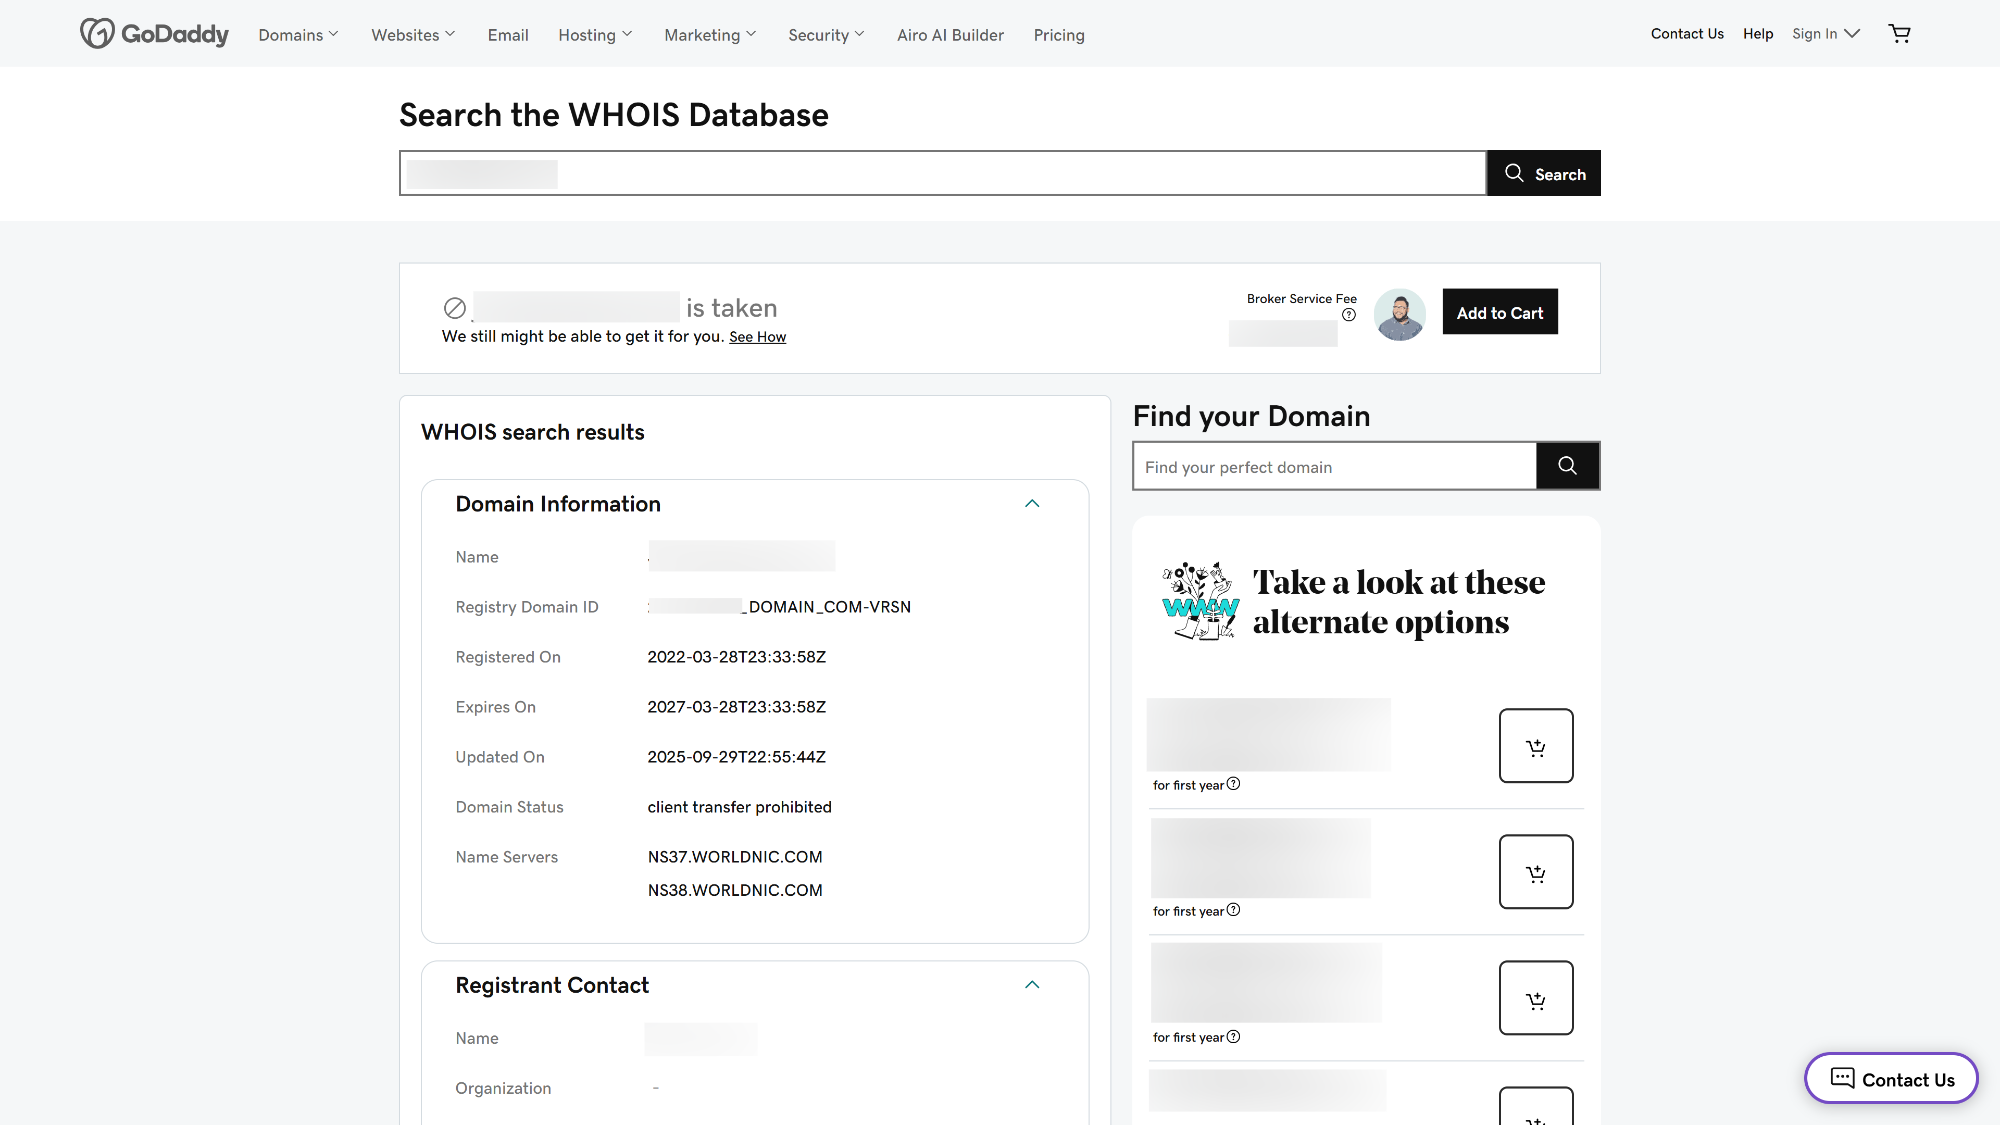
If you don't know where you purchased the domain, go to https://whois.icann.org/en and enter the domain name. On the results page, go down to 'Registrar.'
- If Results are returned, the company name that appears after "Registrar" and/or the domain after 'URL' is the company you registered your domain with. Contact them for further assistance with updating your DNS.

How to View and Manage DNS Records for Existing Third-Party Domains
If your domain name is registered with another provider, you will need to supply the Nameserver information to that provider. This will allow your Website, Hosting, SSL Certificate, or email service that is associated with that domain name to work properly.
- First, you need to connect your existing third-party domain to the website. For details, please refer to How Do I Assign a Domain to My Website?
- Then, from the Account Manager homepage, navigate to Domains on the left menu:

- Click on the Settings button on the domain you need to access the DNS information for:

- Copy the Nameservers to use with your existing third-party domain:

- In the Domain management dashboard of your third-party domain provider, add the copied Nameservers:

Please Note: If you don't know where to add the Nameserver data, please contact your domain provider for help. DNS updates can take up to 48 hours to take effect.
- If you would like to use your own existing Nameservers, you can add the DNS Records instead. Point your third-party domain to the displayed IP address in your provider's Advanced DNS settings:
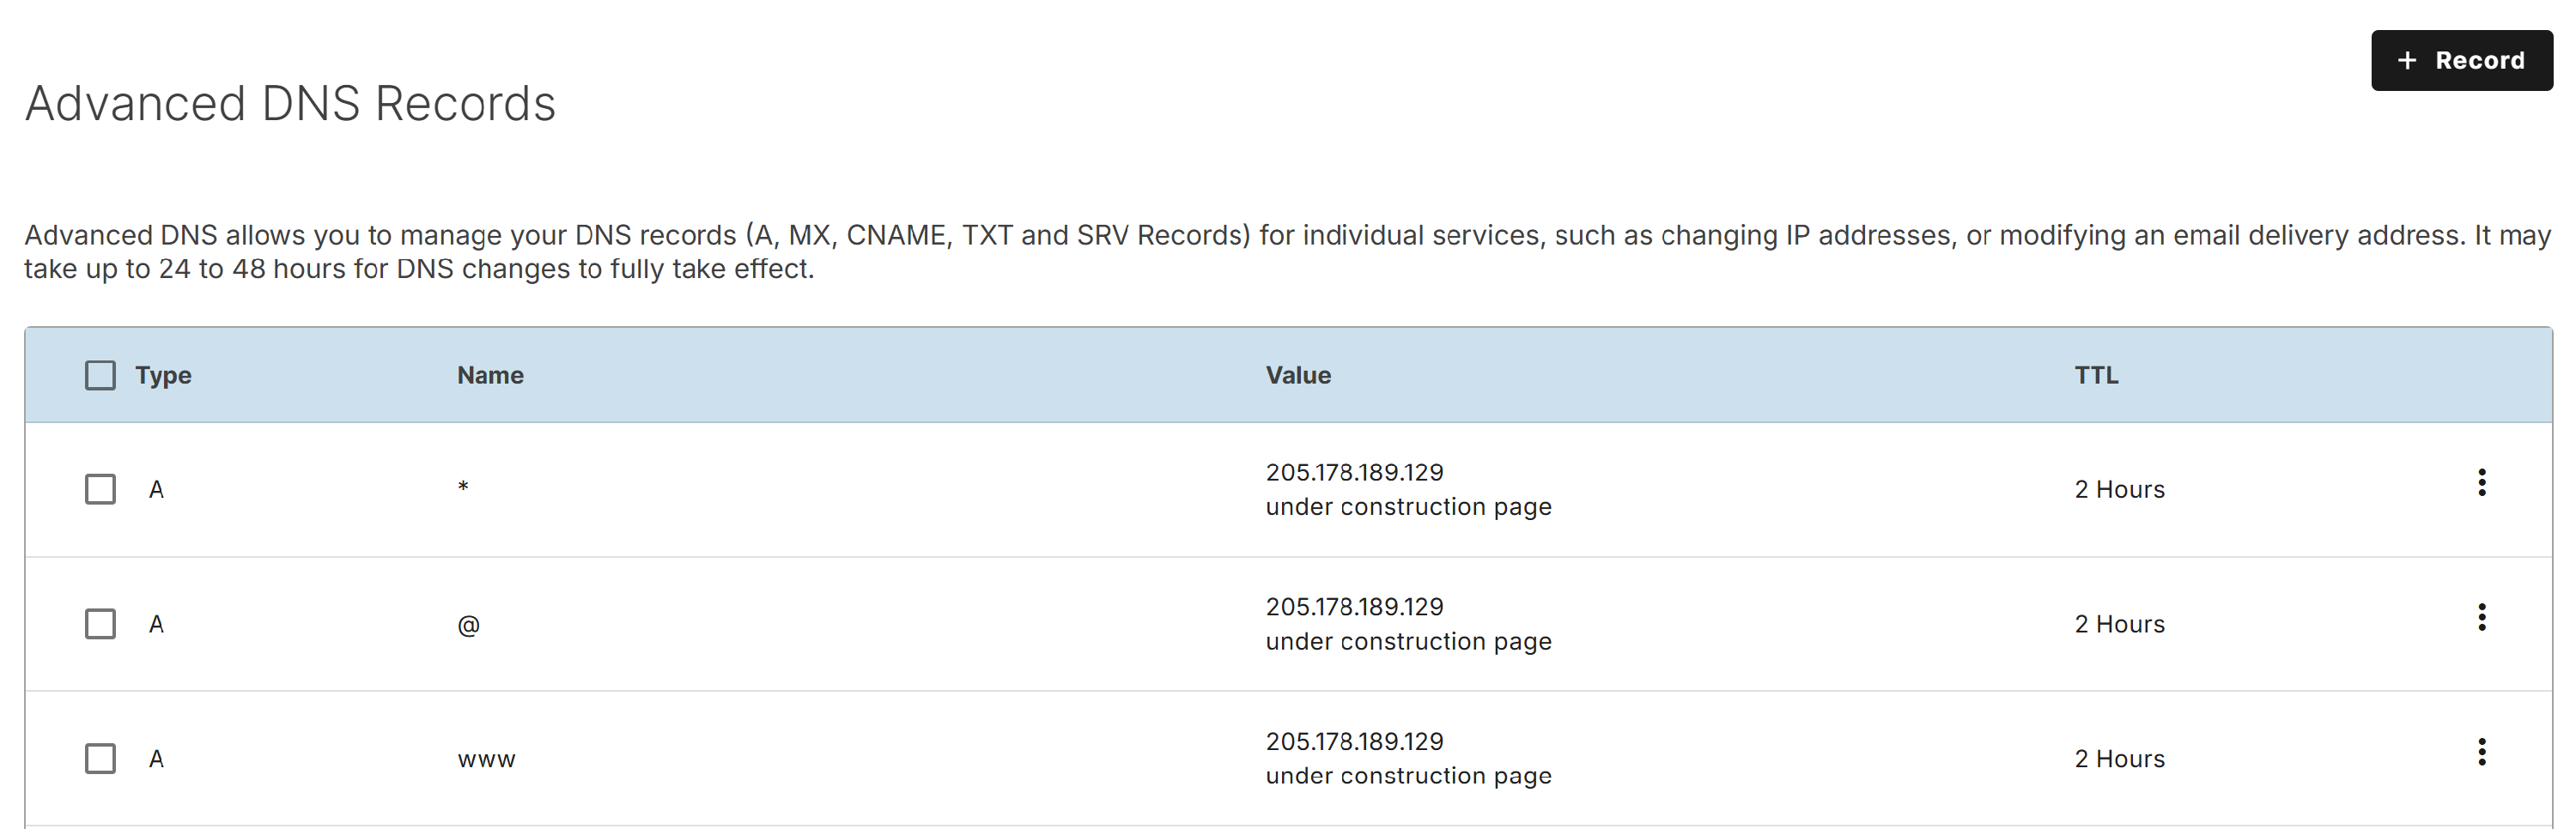
Please Note: You do not need to add the DNS Records if you have provided the Nameserver information above to your Registrar.
Review
You can effectively address and resolve common domain issues encountered using Network Solutions DIY Website Builder by following the troubleshooting tips in this guide. These practical solutions will help ensure your website remains accessible and functional, whether it’s DNS configurations, domain registration problems, or connectivity challenges.